How to install WordPress on Google cloud with Nginx
Introduction
Hosting a Wordpress website on a Google cloud platform? I’ve been experimenting with this a lot lately and it’s surprising how well it can perform even the free tier. We’ll be covering the process how to install and host wordpress website on google cloud for free. Yes, it can be done(Note - the hosting part for the website will be free, but if you need to buy a domain that’ll be the only expense in this post).
If you sign up for the first time, google will provide you with the 300$ in credit for the first year. After that, you can still use the free tier plan all the time. It does require from you to provide them with a credit card when you sign up(don’t worry, if you don’t go outside free tier plan after the first year you won’t be charged). Also, We’ll go through the configuration for the wordpress, web server, database, pros and cons and the performance.
Overview
In order to install wordpress with nginx on google cloud, we need to do the following:
We need to create a VM in google cloud, install and configure Nginx web server, MySQL, PHP, install and configure the Worpdress. The entire setup process will be done manually via terminal. At the end of this tutorial, we’ll host a wordpress site on google cloud.
Pros
Are there pros hosting wordpress on google cloud? Aside that the solution is cost friendly for someone who wants to start blogging on a budget or for a static website. Also, it’s a good option for developers when something needs testing. Other pros are good server uptime and reliability, good performance and easy server scalability.
Cons
One of the cons hosting wordpress on google cloud is that on free tier plan(if you decide to go with this one) the server resources are limited and because of that, it’s not a good long term solution. if with time, the website visitors increase and website grows in size, it will become difficult for the server to process all that data. Other cons are that all the configuration and maintenance must be managed by you. If you intend to use only free tier, eventually with time, you’ll need to upgrade your hosting plan.
Setup a VM server
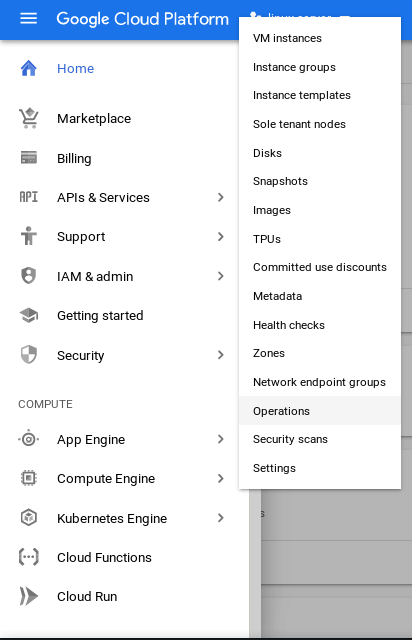
First step(after you signed up for a Google Cloud account) is to create a VM which will act as a web server for our Wordpress site. To do that, in your dashboard, from the navigation menu, go to compute instance menu and select the option VM instance.
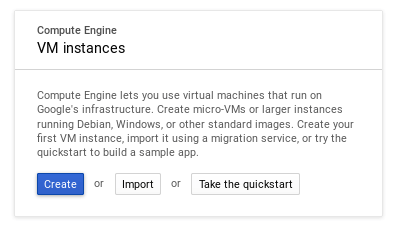
Click on the create button.
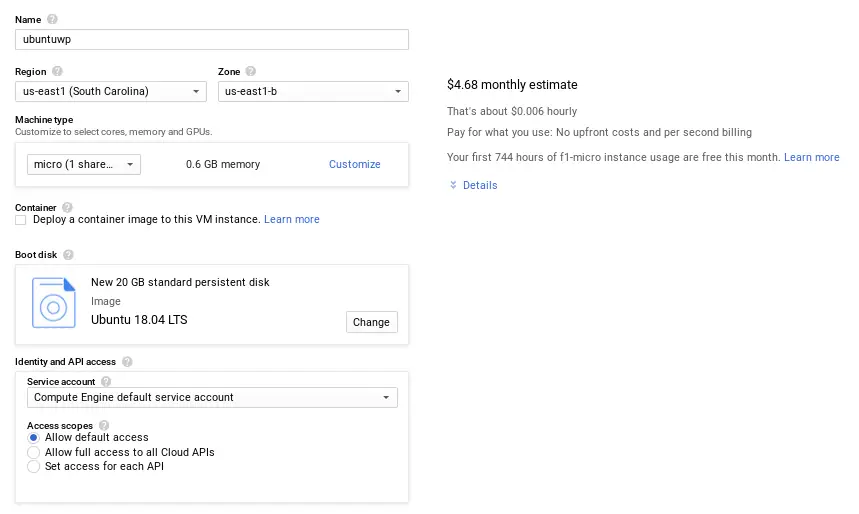
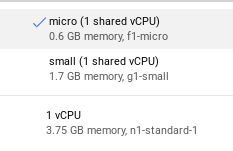
Now we have a setup screen for our VM. On this screen we need to set the parameters for our VM such as operating system, hdd size and etc. We are going to use the f1-micro instance for our VM which is a part of the free tier plan. You’ll notice on the right side of the screen, there’s a description of your selected VM with the price. Only f1-micro instance has an additional text which says that you have each month of 744 hours of free usage.
If you select any other VM instance or a service which is outside the free tier plan, google will charge you. They are going to deduct first from the the 300$ credit(if you’re under the first year trial) then charge your card if you continue to use the service after the first year and the services outside the free tier.
For this example, we are going to use Ubuntu for the OS(Linux distros are free of course, WIndows costs extra). But, you can use any other Linux distro for your OS. Also, you get up to 30GB of HDD on free tier(plenty enough for starters). Bellow you can see the screenshot of the parameters for the VM used in this tutorial as an example.
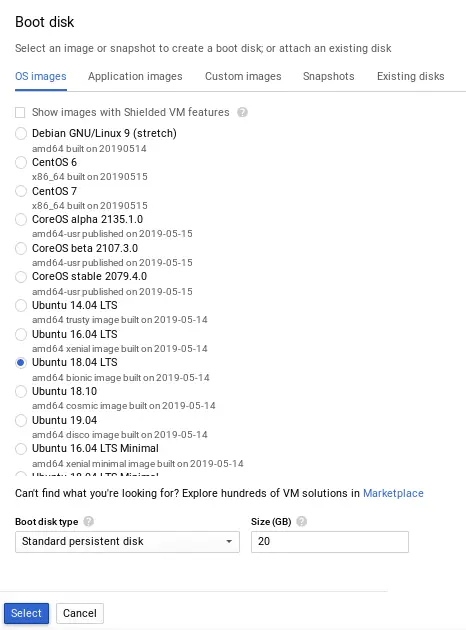
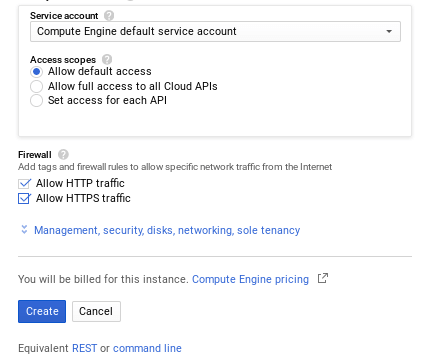
Also, on the configuration window, it is necessary to check the http and https traffic under the firewall section in order to allow the web traffic.
Setup a swapfile
Since our VM has very little RAM, that means performance of the website can be affected and because of that our website can become unstable. To provide a better performance to our website, we need to create a swapfile on our VM. Swapfile is essentially a RAM backup or RAM extension. To access our VM, we need to use SSH connection. There’s a browser terminal client which you can use. Later on, you can set your own SSH connection. Now, access your VM. First thing to do is to update our OS. After that, we need to setup a swapfile.
sudo apt update && sudo apt upgrade

sudo fallocate -l 1G /swapfile
sudo chmod 600 /swapfile
sudo mkswap /swapfile
sudo swapon /swapfile
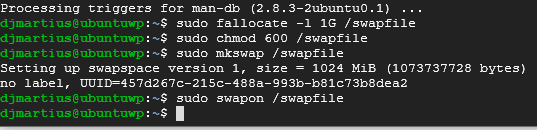
What these commands will do is to:
- allocate 1 GB of HDD space to swap(you can of course allocate more space to swap, just change the number),
- create a swapfile, set proper permissions on it, and activate it.

You can check with htop if swapfile is active or with this command:
sudo swapon --show
You need to have outputs like these:

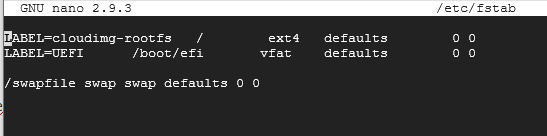
Also what is recommended is to add the swapfile entry in the fstab config file in order to swapfile mounts automatically on system startup. For that we need to use the a text editor. You can use nano like this:
sudo nano /etc/fstab
and add this line at the end of the config file and save it:
/swapfile swap swap defaults 0 0
MySQL server and database setup
Right bellow are commands for MySQL database setup. With them we will do the following:
- Install MySQL server,
- Create a database,
- Setup an MySQL admin user with password and granted all privileges to the database.
sudo apt install mysql-server
sudo mysql -u root
CREATE DATABASE wordpress;
GRANT ALL ON wordpress.\* TO 'wp_admin' IDENTIFIED BY 'Nopassword90!';
quit
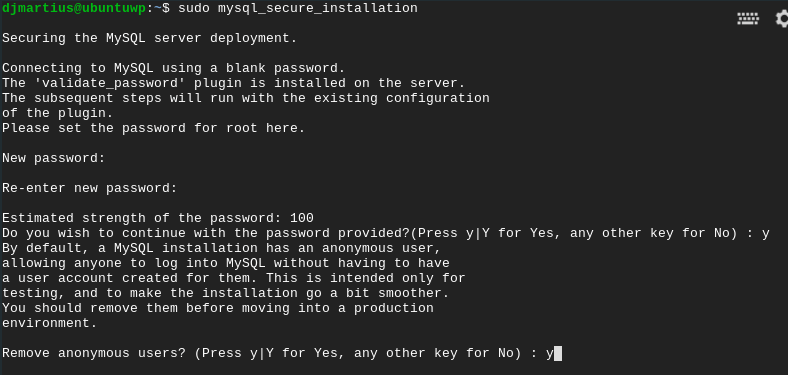
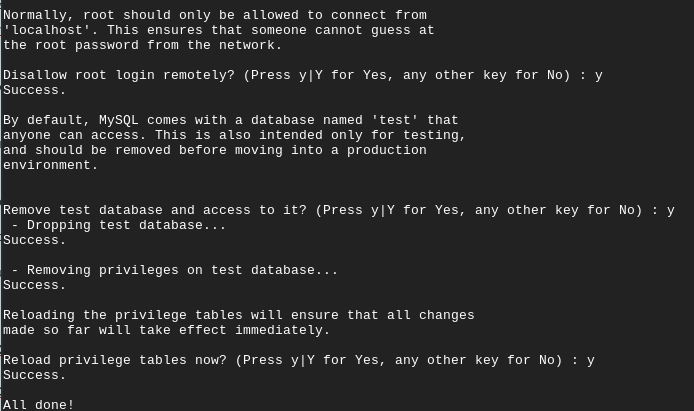
sudo mysql_secure_installation

Install PHP and necessary packages
PHP installation and the necessary packages in order to run Wordpress on the google cloud server and the MySQL database.
sudo apt install php7.4-cli php7.4-fpm php7.4-mysql php7.4-json php7.4-opcache php7.4-mbstring php7.4-xml php7.4-gd php7.4-curl
Install and configure Nginx
Nginx web server installation. After we install the Nginx web server, we’ll also do:
- Make a backup of the Nginx default configuration,
- In the Nginx configuration, add the lines that can be seen from the image bellow
Once the changes are complete, save the file, exit and restart the nginx service. Web server will start running right after the installation and you can test it in the web browser.
sudo apt install nginx
sudo cp /etc/nginx/sites-available/default /etc/nginx/sites-available/backup_default
sudo nano /etc/nginx/sites-available/default
sudo systemctl restart nginx


Download and install Wordpress
Now we can download and install the Wordpress on our google cloud server. Use the command from bellow. What these commands will do is:
- Change directory to the html folder,
- Download the latest version of Wordpress,
- Extract the Wordpress archive
cd /var/www/html/
sudo wget https://wordpress.org/latest.tar.gz
sudo tar -xvzf latest.tar.gz
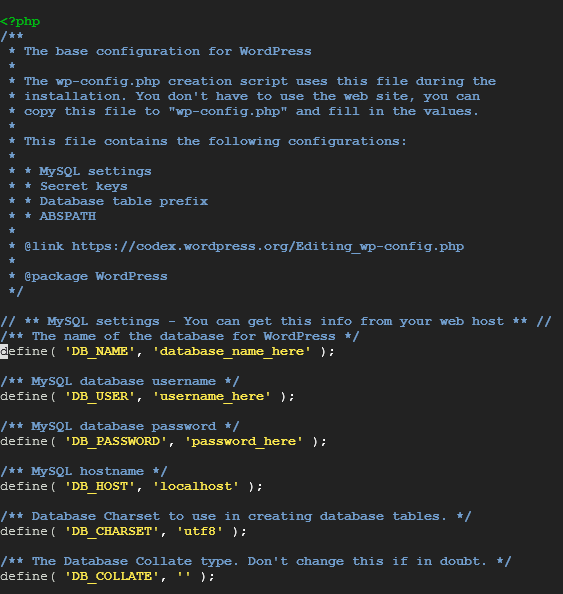
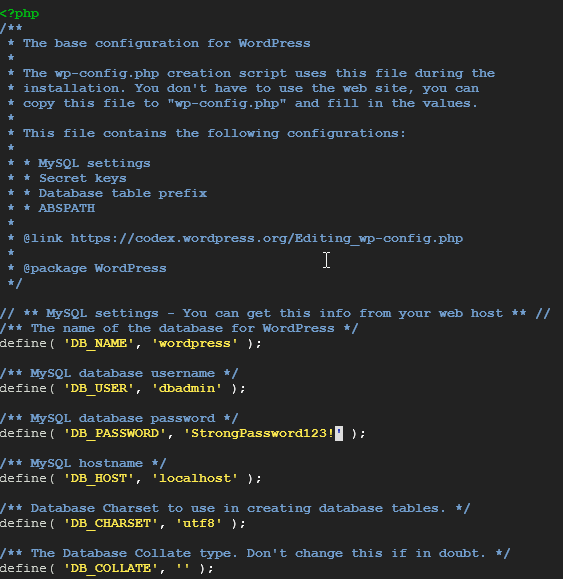
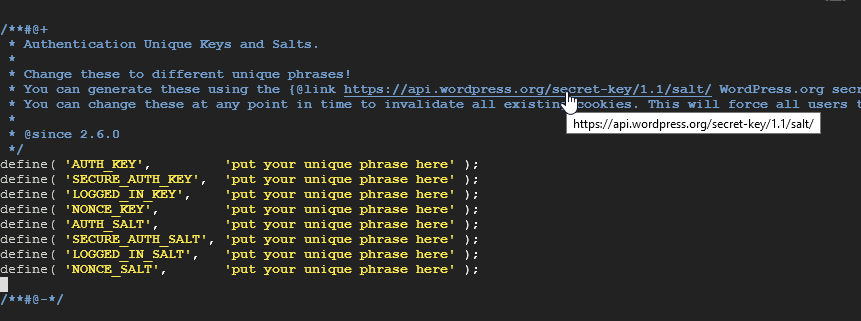
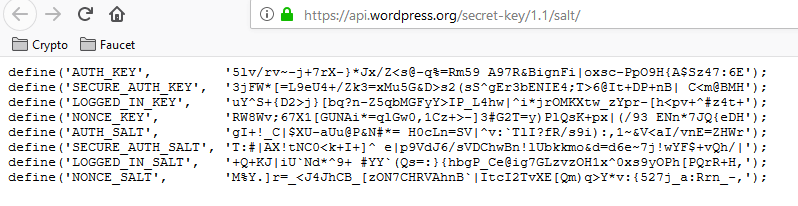
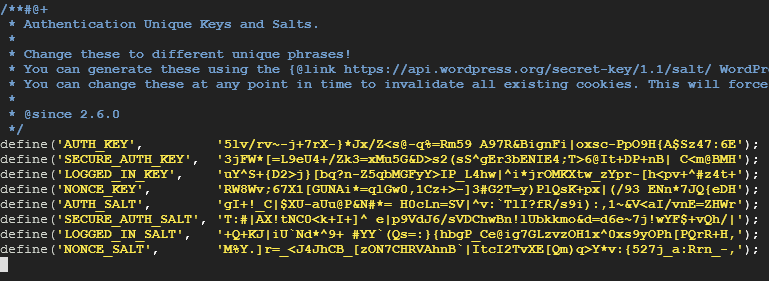
It is also necessary to edit the Wordpress config file before running the installation. In the config file we need to change the values for the database, database user and add the API keys. Use commands bellow to edit the wordpress config file, change the value like in the pictures bellow, save the file and rename the file from wp-config-sample.php to wp-config.php.
sudo nano /var/www/html/wordpress/wp-config-sample.php
sudo mv /var/www/html/wordpress/wp-config-sample.php /var/www/html/wordpress/wp-config.php
Also, add the necessary permissions to the worpdress folder:
sudo chown -R www-data /var/www/html/wordpress/

sudo find /var/www/html/wordpress -type d -exec chmod 755 {} \\;

sudo find /var/www/html/wordpress -type f -exec chmod 644 {} \\;
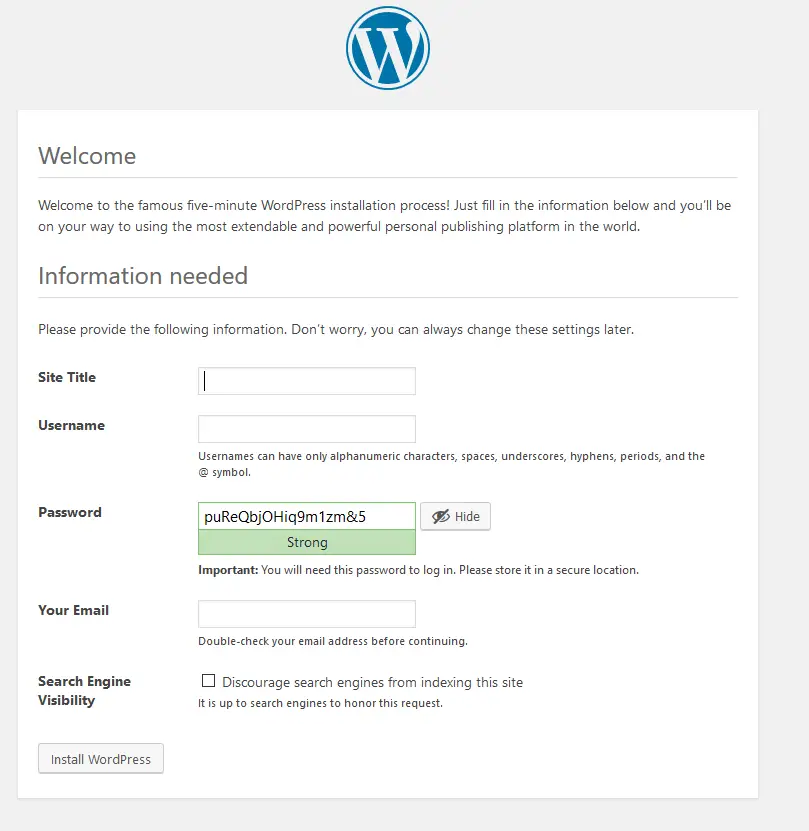
Finishing the installation
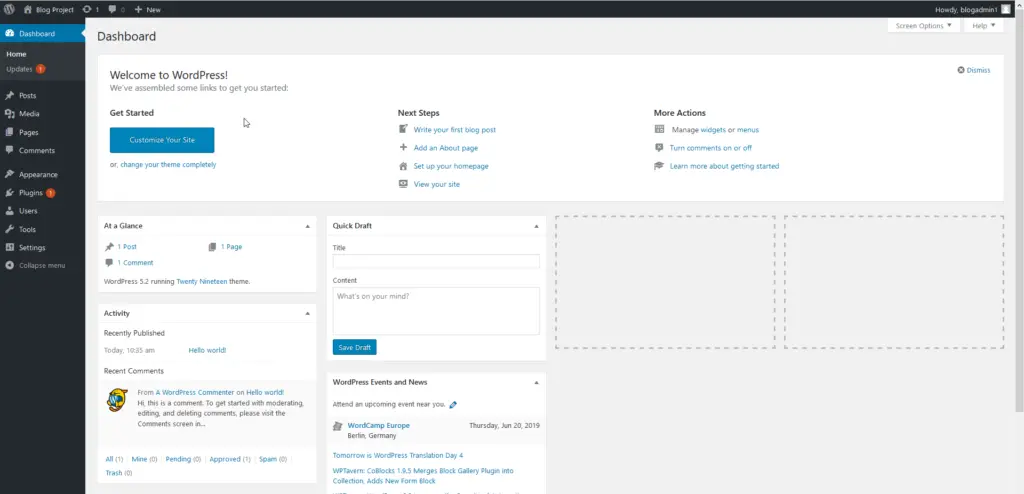
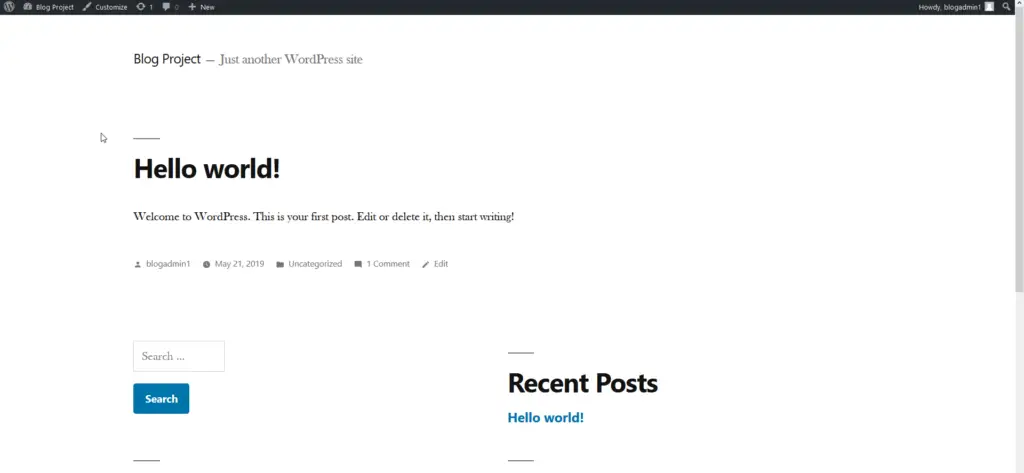
After the changes are finished in the wordpress config file, we can now finish installing the Wordpress. Access the server via web browser and the Wordress install wizard should start.

Words from personal experience(and some tips)
Another thing you must take in consideration is that if with time your site gains a lot of traffic, that will exceed the free tier plan and you’ll be charged by google for the provided web traffic. The cost will be minimal(in pennies and cents depending on the traffic you receive). That’s why it’s a good suggestion to add a CDN to your site(Cloudflare for an example - it’s free for one website). Not only it will save you traffic, it’s also an additional layer of security.
Nginx requires some additional tuning and configuration in order to run at peak performance and to configure caching as well. Whereas Apache server will run at optimal performance straight out of the box, requires less configuration at the starting point, has caching by default - but it can be more resource heavy(Here you can check Apache version for Wordpress installation on google cloud).
Summary
So, is it worth it to host a wordpress on google cloud? To be clear, even though the solution is cost friendly(free tier plan), it’s not a perfect solution and not a long-term solution as well. Of course, the VM’s with higher specs will do the job much better, but the Google’s plans for stronger machines are not cost friendly for starting out. If you decide to have a stronger specs, then I suggest to check providers such as Hetzner(For Europe),UpCloud, Linode or similar.
Besides, it requires you to run the maintenance on everything by yourself, the resources are limited on the free tier as well and because of the limited resources, the server will not be able to handle the heavy site growth and a large visitor traffic. Eventually you will need to upgrade your hosting plan. But, this option is a good starting point for someone who wants to learn and experiment with blogging on a budget, to test out how the site will perform. Also, this is a good option for static web sites.
I hope you found the article interesting and I thank you for your time.