Overview
On this post we are going to showcase the steps how to Install OpenVPN server on Rocky Linux 8. OpenVPN is one of the well-known and a great open-source VPN solution. The scenario of our process on how to install OpenVPN server is going to be performed as following:
- Deployed Rocky Linux 8 machine with firewall.
- We’ll be using an OpenVPN installation script from Github made by angristan(huge shutout and kudos to him for making such an amazing script). The Installation process done manually is not difficult, it actually requires many steps and can be time consuming(especially if you miss-configured a step which can consume more time by troubleshooting). For the simplicity and ease of setup we’re using the angristan’s script(big thanks to him for sharing the script).
Another interesting method of deploying OpenVPN server is via Docker container. The process can be looked at this post - LINK.
How to Install OpenVPN server on Rocky Linux
OpenVPN server installation
1. Download the install script:
curl -O https://raw.githubusercontent.com/angristan/openvpn-install/master/openvpn-install.sh
If by any chance, you do not have curl tool installed, you can install by running the following command:
sudo yum install curl
2. Make it executable and run it:
chmod +x openvpn-install.sh

./openvpn-install.sh

3. Public and private IP addresses: The script will start the installation process with a series of questions following with a prompt and your response, in order to configure the OpenVPN as soon as it installs it. On the first prompt, it’ll ask you - is your Rocky machine behind NAT and to provide it the Public IP address of the server.
This is the most common case if you use a VM from a Cloud provider or you need to connect remotely to another office which is placed on a different location.
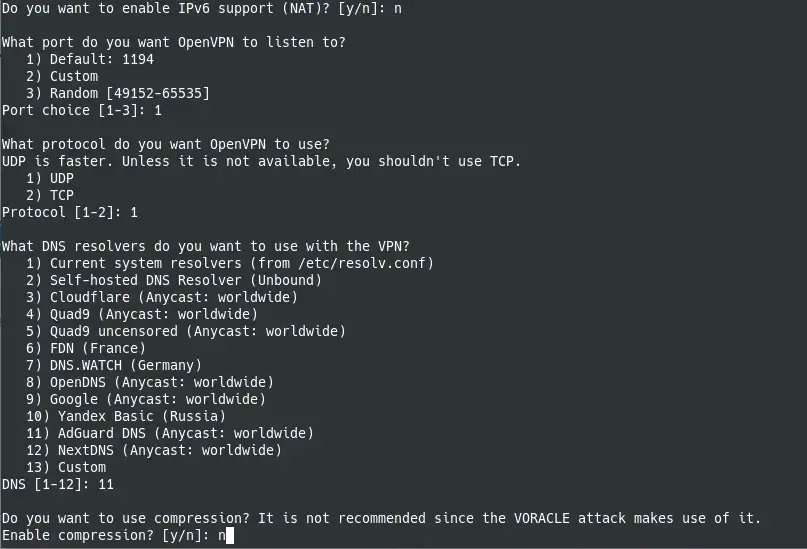
4. IPv6 and Port number: The next prompts are going to be - do you want to enable IPv6 support, which is set to NO by default and you leave it as is and which port to use for OpenVPN to establishes connection. OpenVPN by default uses 1194 port but you can also set a custom port as well. Examples of these prompts are shown at the following picture:

5. Protocol, DNS resolver and compression: Network protocol by default will be selected to UDP. You can leave it at and it’s more preferred for VPNs to use UDP protocol. Otherwise, you can go with TCP protocol as well and it will work. OpenVPN requires a DNS resolver to use. That can be almost any but you can set Google or OpenDNS(option 8 or 9). For compression go with NO which is set by default:
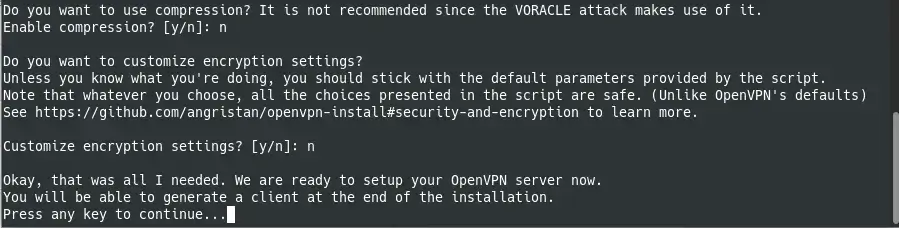
6. Encryption: Here we have prompt for encryption settings. You can go with NO, if you’re not sure or not familiar how to set it and configure. You can leave the on NO since by default the install script will generate the SSL certificate and include it in the client config which will as well encrypt the VPN tunnel. After these prompts, it will notify to press any key to complete the installation. Then it will start and it will take couple of minutes to finish.
7. Client settings and parameters: Enter the name for the first client device(picture bellow).

8. Protect the client configuration file with a password: You have an option to set a password for the client in order to connect to the server or not(picture bellow).
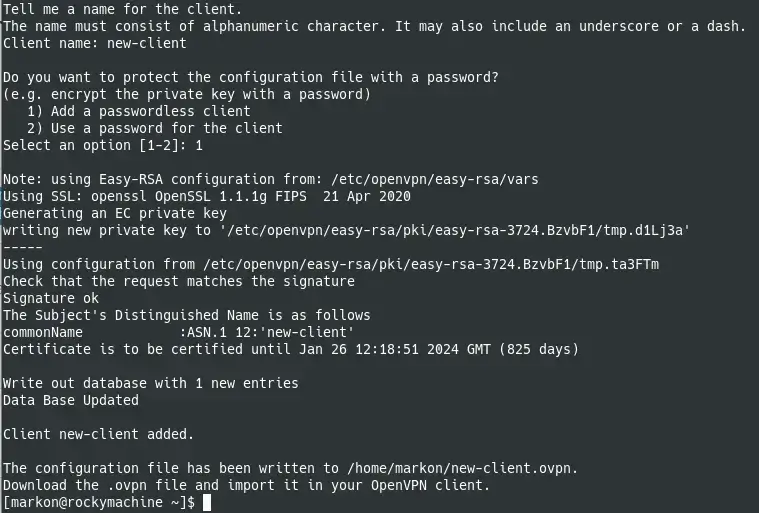
9. Completion and download the .ovpn client configuration file: Here the script notifies you that the installation and configuration is done and where it have placed the client configuration file which you need to download and place it on your client(upward picture).
Connecting client to the OpenVPN server
As mentioned, after the installation, download the .ovpn client file(you can use a SSH client with integrated file manager such as MobaxTerm or Bitwise or similar.) On Linux you can download the file with sftp:
sftp [email protected]

get client_config.ovpn
The file will be download to your home directory.
If you’re using the shell version of openvpn client(no gui), in order to connect, just in terminal run the openvpn with the filename and location of your .ovpn client config fike:
openvpn your_client_config.ovpn

On the GUI version, you can just import the config file and that’s it.
Adding another client
To add another, new client, on the server just run the install script again and it will offer you the option to add another client:
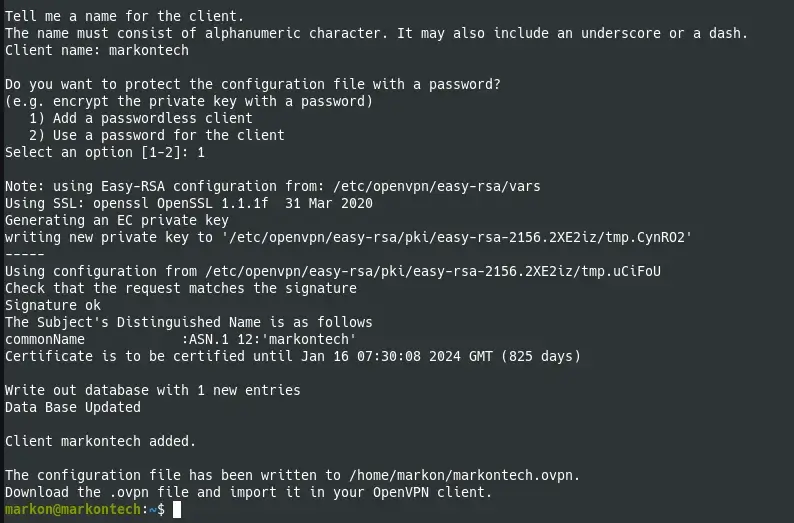
The procedure is simple and the same as when you created the first client. Add a name and download the client.
Firewall configuration
Rocky Linux comes with active firewall straight out of the box and it will in running state from the first boot, so in order to be able to establish the connection with the OpenVPN server, you need to add firewall rules to allow OpenVPN connection on the server. Commands to run are the following:
FIREWALLD config

sudo firewall-cmd --zone=trusted --add-service=openvpn
sudo firewall-cmd --zone=trusted --permanent --add-service=openvpn

sudo firewall-cmd --add-masquerade
sudo firewall-cmd --permanent --add-masquerade

sudo firewall-cmd --zone=trusted --permanent --add-port=1194/udp

sudo firewall-cmd --reload
Summary
To summarize the article - we went through the process on how to Install OpenVPN server on Rocky Linux, using an auto-install script from Github, which speeds up and simplifies the process. The reason we choose this script is because it can help us deploy the OpenVPN server solution in matter of minutes and it also covers and automates the most of the configuration for the most common use case scenarios.
Thanks for your time…