Upgrade firmware on a Cisco switch in GNU/Linux | Tutorial
We’re going to cover the procedure how to upgrade firmware on a Cisco switch, or if you prefer more, how to upgrade IOS on a Cisco switch. Like it’s said in the title, our working environment will be a GNU/Linux distro. The entire upgrade procedure will be done in GNU/Linux and using Linux tools. Also, for this tutorial, we will be using Cisco Catalyst 3560G - 48PS switch as an example, but the process is same for any other Catalyst switches. We will be using a method via tftp server and protocol in order to upgrade our switch. In order to upgrade firmware on the Cisco switch or any other switch, there are few requirements that are necessary for this procedure:
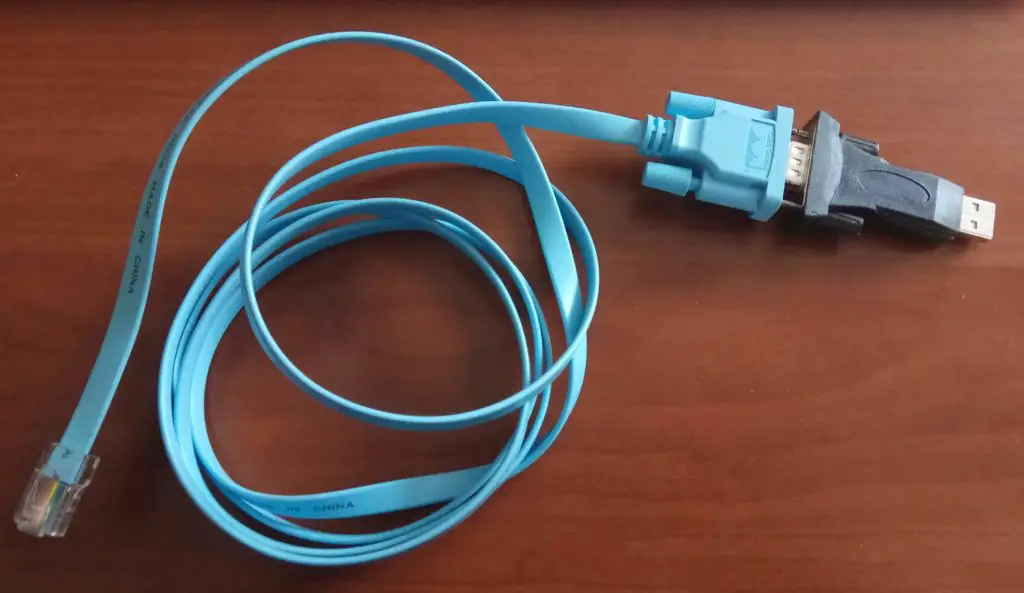
- Console cable
- and a USB Serial adapter
- TFTP server
- Ethernet cable
- IOS image placed on the TFTP server
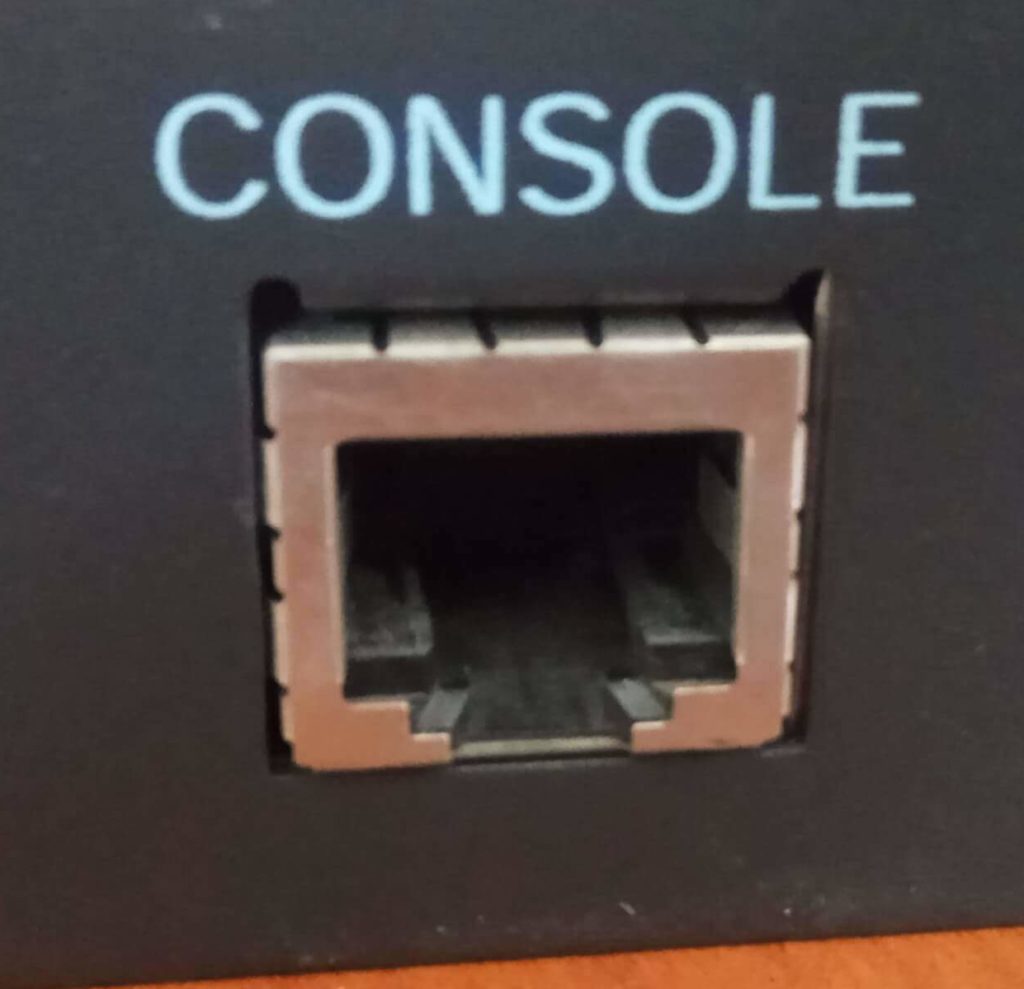
Just in case, here are the pictures of the necessary cables, the adapter and the picture of how most console ports looks like on Cisco devices.

Installing the TFTP server and a client
For this process we’re going to use the TFTP protocol to transfer our IOS firmware image from our PC to the Cisco switch. We need to have a TFTP server and a TFTP client on our PC. In order to do so, install the following packages from down bellow:
$ sudo apt install xinetd tftpd tftp
Next, while still in the terminal, navigate to the following file using the text editor:
$ sudo nano /etc/xinetd.d/tftp
This command will start the nano text editor and open the TFTP config file, located in the etc/xinetd.d directory.
Make sure the file contains these entries:

These are the set of instructions and configuration for our TFTP server(which network protocol to use, which port to listen, permissions for the user, server location, folder name).
Now we need to create a tftpboot folder(folder name must match the server_args argument) and also to set the permissions to it and the ownership. Run these commands in the terminal:
$ sudo mkdir /tftpboot

$ sudo chmod -R 777 /tftpboot

$ sudo chown -R nobody /tftpboot
NOTE: One issue that may happen with this configuration, and once it did happened to me, is that the TFTP session can timeout when you start the transfer. I solved the issue by changing the ownership of the tftpboot folder to the root account and also changed the permission to the root account as well in the TFTP server config file. So, if this happens to you, change this entry in the TFTP config file:
user = root
and for the tftpboot folder use this command to change the ownership to the root:
$ sudo chown -R root /tftpboot
After you’ve completed the setup and configured the TFTP, run this command in order to restart the xinet
$ sudo service xinetd restart
Connecting and accessing the console
We need to check if we are able to access our switch. For that we’ll be using the console connection, so we need to use our console cable and the serial USB adapter. First step is to connect the console cable with the USB serial adapter and connect it to your PC and the other end, connect it on the console port on your Cisco switch. Then, start the terminal. In terminal we need to run one command and to determine on which USB port number our adapter is connected. We need that info in order to run the serial connection. In terminal run the command
$ dmesg | grep tty
You need to get an output like this(image bellow)

The last line in the command where it says - pl2303 is now attached to ttyUSB0. That ID ttyUSB0 is our USB ID where our serial adapter is connected and we need that ID to use when starting the serial connection. Now we need a tool like putty, screen or minicom in order to establish the connection and access the command line interface on our switch. For this example we’ll use putty. I also suggest to run putty as sudo(you can start it from the terminal - sudo putty) since it may happen that the putty won’t be able to establish the connection to the Cisco device. Error that may pop out is the it cannot open the serial port. That means, the regular user does not have permission to open the serial port. If this happens, try to run putty as sudo or use another tool such as screen or minicom.

Configuring the Cisco device and the IP addresses
Next step is to configure the IP address on both, the Cisco device and on the PC. Both devices must have a static IP address and both IP addresses must be from the same IP pool. The PC will act as a TFTP server. In our example, we’ve set an IP 192.168.1.1 on the PC and on the Cisco switch 192.168.1.2 with subnet mask 255.255.255.0 (24).
On many Linux distros, to set a static IP address is similar… When you hit the super key(key with windows logo on most keyboards) just search for network connections or network configuration or as well you can right click on the network connection icon applet and click on the edit connections options.

In all cases, no matter how you open this menu, you’ll get a window like this(image bellow). Double click on the wired connection in order to edit it.

When you open this window, click on the IPv4 Settings tab.

In the IPv4 tab, we first need to change the method, switch it to manual, since we will be setting the IP address. Next, click on the Add button, and the cursor will right away jump to the new field. Fill out the fields like this(image bellow) or set the IP address which you prefer. Then go ahead and click save.


Now we need to set an IP address on our Cisco device. Start the console session, using the putty or a similar tool and connect to your Cisco device.
When the devices prompts for to initialize configuration dialog, enter the letter n and hit enter. Access the device, enter enable or just en and hit enter. Now we need to go to the configuration menu - type in configure terminal or just conf t and hit enter. In this example, we used ethernet port number 1, so we configured that one and another thing we must configure is to activate a Vlan. Now, type in the commands:
interface Vlan1

ip address 192.168.1.2 255.255.255.0

no shutdown

exit

What we did here is we activated the Vlan1 interface and assigned a static IP address. Now we must activate our ethernet port. Our switch has ethernet ports and some models do have gigabit ports so depending on the ports, the syntax in the command will vary(fastethernet or gigabitethernet) . Run the command to access and configure a port. We used a port number 1 as an example. You can use any other ports you wish, they are all numbered. Type in:
interface fastEthernet 0/1

Then run these commands:
switchport mode access

switchport access Vlan 1

no shutdown
What does these means is, we basically told our Vlan interface to use port number 1 in order to access all the network traffic. You can exit the configuration mode and use the ethernet cable and connect your PC with the switch. Like we mentioned earlier, we will use port number 1 on the switch. Usually, port number 1 is on the top left corner. On the front panel, ports on Cisco devices are labeled by a number with an arrow in order to recognize which port is which.
Transferring the new firmware
Before running the upgrade, what’s worth mentioning is to check couple of things. First to see is switch communicating with the PC and vice versa, for that you can run ping command - ping 192.168.1.1(In the terminal on PC and in global menu on Cisco device). Also. what I like to do is to check for free space on the cisco device and to backup the firmware which is currently installed. The reason for this is , it may happen that the onboard flash memory on the cisco device does not have enough of free space and because of that, you won’t be able to run the upgrade. Then in this case you need to backup the firmware first, delete it and transfer the new one in order to run the upgrade. First run this command to view the flash memory:
dir flash:
or
show flash

This command will display what it contains, all the files, the firmware image, file sizes, file names and the free space. To backup the the current ios image, run this command:
copy flash: filenameofthefirmware.bin tftp:
This command simply tells the switch to copy the firmware image from the flash memory to the TFTP server. You can see an example in the image bellow.


You’ll get couple of prompts to confirm the IP address of the TFTP server and to provide the file name of the image when it’s copied over the TFTP server, you can just confirm the old name. If you need to delete the old firmware in order to clear up the space, run this command:
del flash: filenameofthefirmware.bin
Now comes the part the transfer the new firmware to the switch. First be sure that you have the new firmware image placed on the TFTP server. This means that you only need to copy the firmware image in the tftpboot folder we created earlier. Now, in order to copy over the new firmware on the switch, we’ll be using the command when we were backing up the old firmware, we’ll just replace the places of few syntax’s. Run this command:
copy tftp: filenameofthenewfirmware.bin flash:
This will tell our switch to search for the new firmware with that name and copy it to it’s flash memory. Example underneath as well. Again, you’ll have two prompts to confirm the destination and the filename of the new image.

Running the upgrade(booting into the new IOS)
After we’ve transferred the new firmware, now it’s time to configure the switch to boot it. For this we need to be in the configuration mode. Run these command:
conf t

boot system flash: filenameofthenewfirmware.bin

exit

write memory

reload
With this, we told our switch to use the new firmware in order to boot IOS, to save the new configuration and reboot. Example of the command is down bellow.

After reboot, the switch will boot the new firmware. And this was the process of upgrading the ios firmware on a Cisco catalyst switch.
Summary
We covered one way to upgrade firmware on cisco switch. This method, using the tftp server, is probably one of the simplest methods to upgrade the cisco firmware. In summary, the entire process is actually transferring the new firmware file and configuring the switch to run it. With this method you can upgrade firmware on almost all Cisco switch models and other devices (routers, ASA firewalls etc..).
I thank you for your time. I hope the post was helpful.