Setup Kubernetes cluster with Rancher
Overview
In this post we will go through the process how to setup Kubernetes cluster with Rancher. Kubernetes is an amazing technology and one of the best way to orchestrate your containers. But sometimes, if you have a lot of containers or planning to host a lot of applications, it can be a bit easier to manage all those with a GUI dashboard, like Kubernetes dashboard. In this article we will cover the Rancher software, how to install it on Debian 10 Buster and how to setup Kubernetes cluster. This method can be done on Debian VM or on a bare metal machine and it also works on Ubuntu.
Note - Since we’ll be using Rancher, they suggest in their documentation to deploy Rancher in HA configuration(Highly Available configuration) which is of course highly recommended if Rancher is intended for production use.
But on this post we’ll first focus on how to deploy Rancher for a scenario when you don’t have much resources to spare or just want to deploy Rancher locally or for a lab/testing environment. For that reason, we’re going to deploy Rancher with Docker.
Rancher?
Rancher is also one of the container orchestration software with a dashboard, similar like Portainer.io. But it is also much more. Not only it supports Docker and Kubernetes, it has Kubernetes cluster management, can run the K3S Kubernetes distro, it’s open-source and can be self-hosted but it’s also DevOps ready for various cloud computing platforms, such as - AWS and Azure.
Install Docker
1. First we need to start with installing Docker on our Debian machine. Just to be sure, we will install the latest supported Docker version by Rancher. They have their own install script for Docker, which is updated and automated. You can check the script from this link.
curl https://releases.rancher.com/install-docker/19.03.sh | sh
After the Docker is finished with installing, make sure that it’s running properly.
Install Rancher
2. Next step is to install Rancher. Rancher offers multiple SSL options to deploy with Rancher - self-signed, with a CA root certificate, Let’s Encrypt. You can check out these options on their documentation - LINK
docker run -d --restart=unless-stopped \\
-p 80:80 -p 443:443 \\
--privileged \\
rancher/rancher:latest
This is the default deployment option with a self-signed certificate. We will use this configuration do deploy our Kubernetes cluster in this post but we’ll make a few adjustments and add a persistent data options in this deployment so that we have mounted directories from our host machine and all the data is stored there and not in a container.
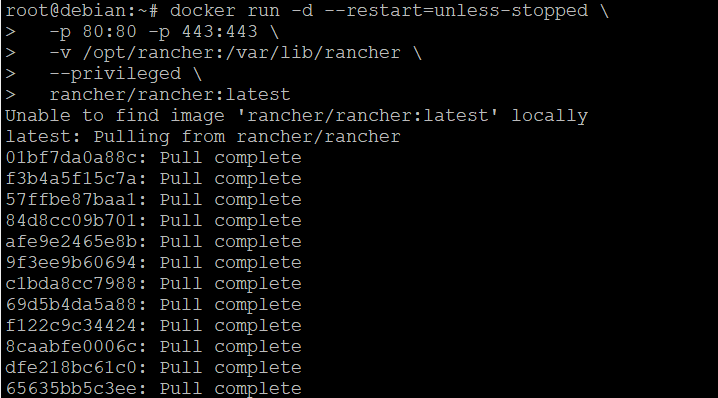
docker run -d --restart=unless-stopped \\
-p 80:80 -p 443:443 \\
-v /opt/rancher:/var/lib/rancher \\
--privileged \\
rancher/rancher:latest
This is the configuration we’ll be using for our Rancher deployment.
Once the deployment is completed, you can access the Rancher dashboard via your web browser.
Install Kubernetes
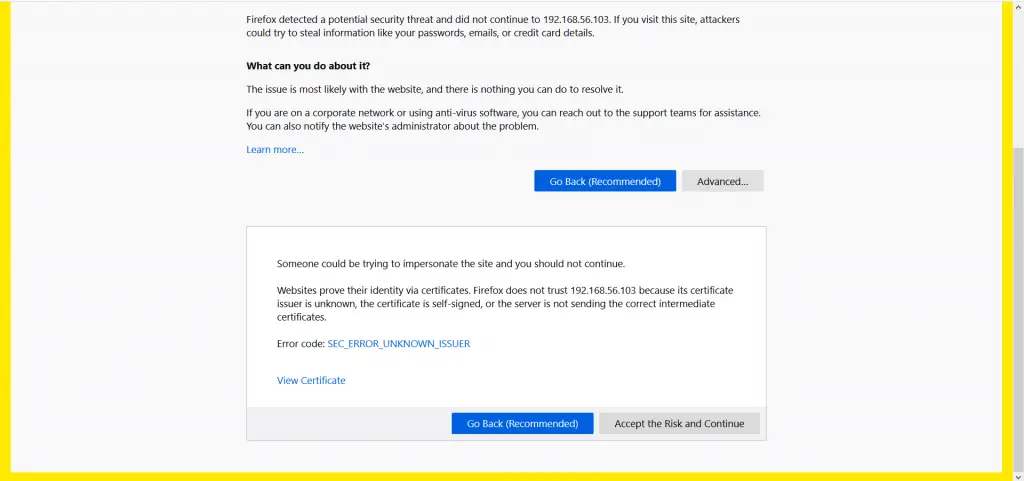
Access the Rancher on your browser with the IP address of your host machine, with the HTTPS. The browser will pull up first the security prompt since we deployed the Rancher with a self-signed certificate. You can go ahead and accept and continue.
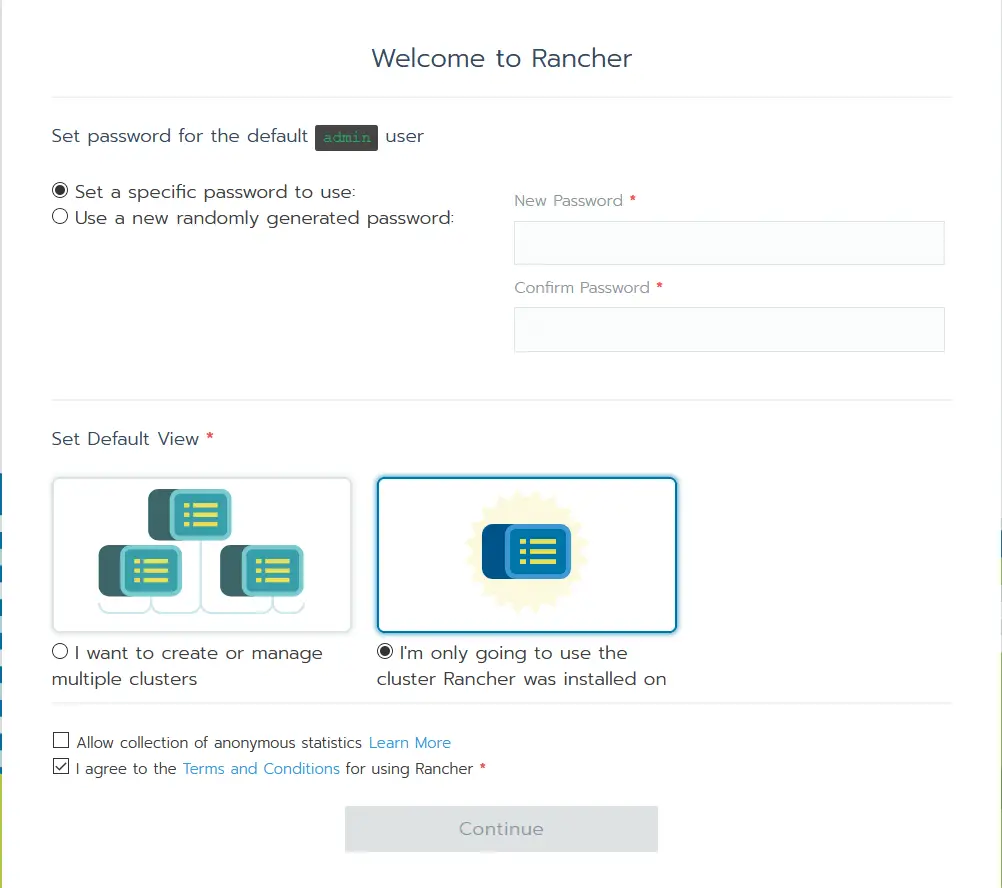
Next is the login setup and to choose the Rancher management mode - to manage multiple clusters or a single one on the host machine where Rancher is installed. We’ll go with the second option to managed one cluster where Rancher is installed.
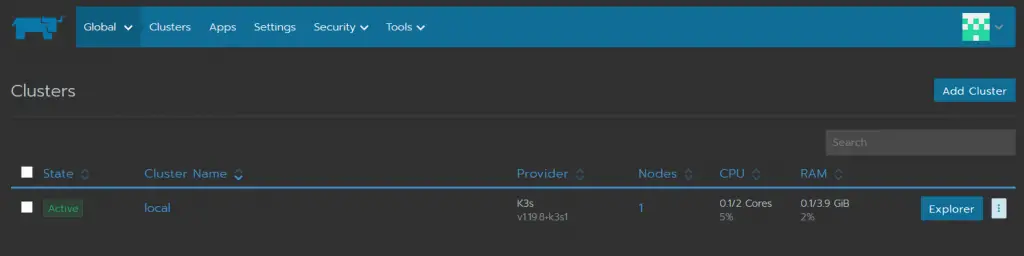
During the installation process, Rancher installs and setup’s a default Kubernetes cluster which you can use right away.

Deploy new cluster
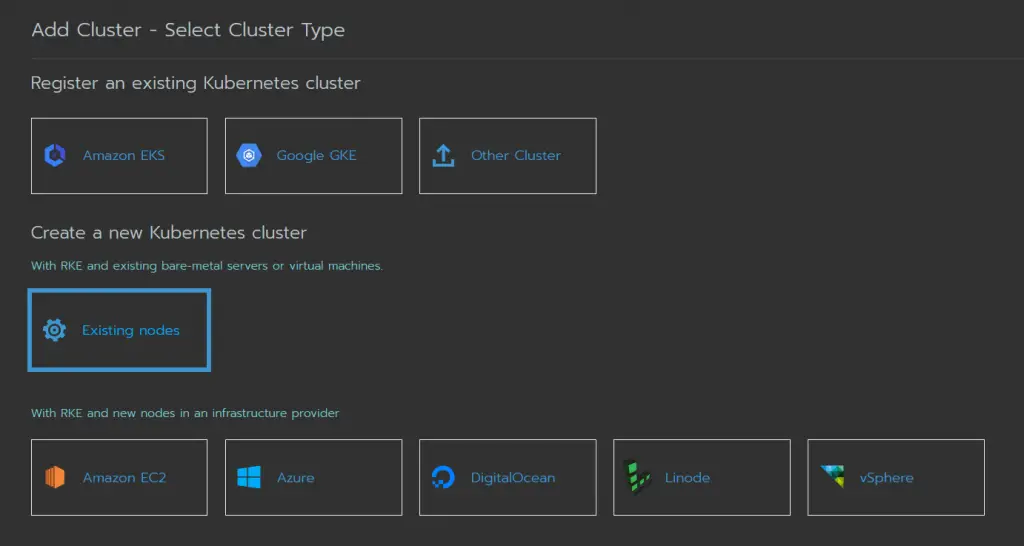
If you need to deploy a new cluster(or another one), besides having the default one, go to the - add cluster option.
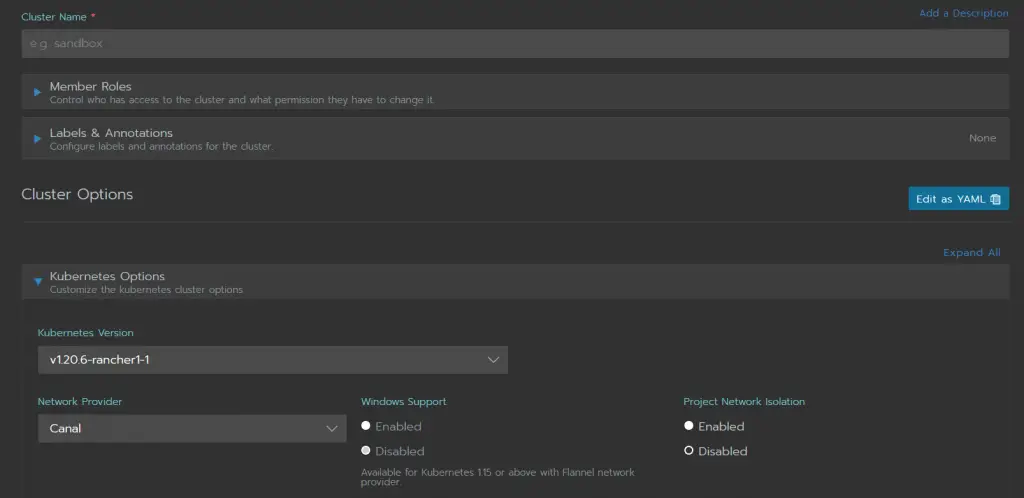
On the first screen where Rancher is asking for to provide the information about the cluster, you can leave as is, by default everything is pre-checked to run a cluster with the latest Kubernetes version with everything necessary to run the cluster, just provide the cluster name. But you can still change and edit the settings to your needs(like a Kubernetes version and it even provides an option to create a YAML config file to setup the cluster environment).
The second prompt is asking us to choose where we need to deploy the new Kubernetes cluster. We’ll go with the existing node(which is our running server).
And the last requirement is to choose the node options which to deploy as well on the cluster, and we need to choose the etcd, controler and worker(which are all important kubernetes elements).
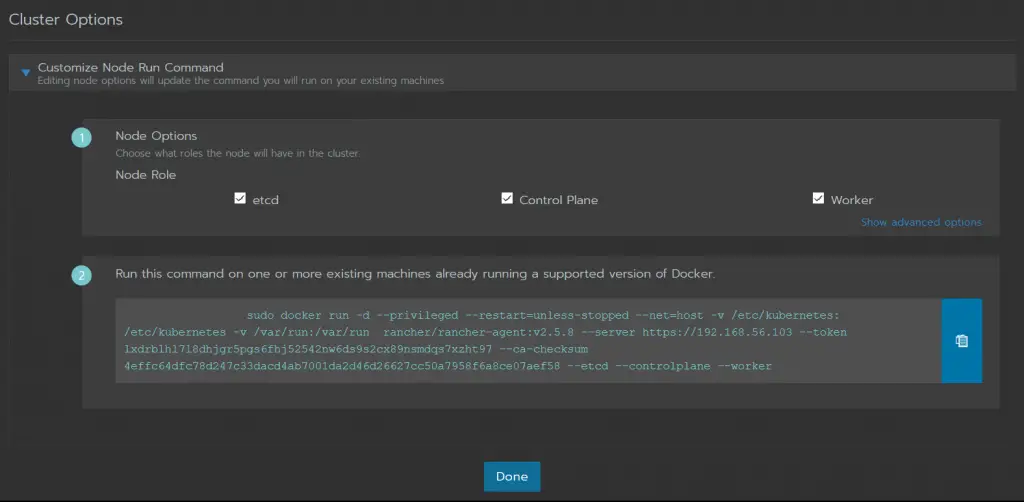
Once we select all those options, it will generate a one line terminal command, which we need to copy and run on our server.
This command will automatically create and start our new cluster we configured. And our new cluster is now deployed and running.
Summary
We covered the process how to setup kubernetes cluster with Rancher. With Rancher, the process is straightforward and doesn’t take much time. Overall, Rancher is a good option for managing Kubernetes.
Thank you for your time…