How to install DD-WRT on TP-Link router
Requirements
In this post, we’re going to cover the procedure on how to install DD-WRT on TP-Link router. I have a habit of installing DD-WRT firmware on every commercial grade wifi router I have or if buy a new one. I use it for years and I love it. When I had only access to commercial grade wifi routers, which you can buy in any PC store, tech store etc, over time the features in the factory made firmware could not meet my needs. They lacked the control and features I need.
Then I discovered the DD-WRT. It has a lot of features, it gives me more control over my network and the best part is - it’s open source. For an example, with DD-WRT, I managed to turn couple of old TP-Link router into access points and created a mesh Wi-Fi network in my house to increase and expand my wifi coverage(post here).You can say, with DD-WRT firmware, wifi router gets an upgrade. So, in this post we will cover the process how to install DD-WRT on a TP-Link router.
Requirements for the process:
1. DD-WRT firmware.
2. Tp-Link router
3. Ethernet cable
4. PC or laptop
Below is video tutorial as well:
What is DD-WRT and what’s special about it?
DD-WRT is a Linux based alternative OpenSource firmware suitable for a great variety of WLAN routers and embedded systems. The main emphasis lies on providing the easiest possible handling while at the same time supporting a great number of functionalities within the framework of the respective hardware platform used. The graphical user interface is logically structured, and it is operated via a standard Web browser, so even non-technicians can configure the system in only a few simple steps.
Main characteristics:
- supports more than 200 different devices
- comprehensive functionality
- supports all current WLAN standards (802.11a/b/g/n*)
- supports outdoor deployment*
- supports enhanced frequencies*
- VPN integration
- supports various Hotspot systems
- bandwidth management
- multilingual user interface
Procedure
Downloading DD-WRT firmware
First step you need is to connect your TP-Link router to your PC with an ethernet cable and to download the DD-WRT firmware. The ethernet cable goes into the one of the yellow ports on the tp link.
I would suggest to do the process with a laptop so that you have an internet connection over wifi and connected to the TP-Link router with a cable. If you don’t have a laptop, then first thing to do is to download the firmware.
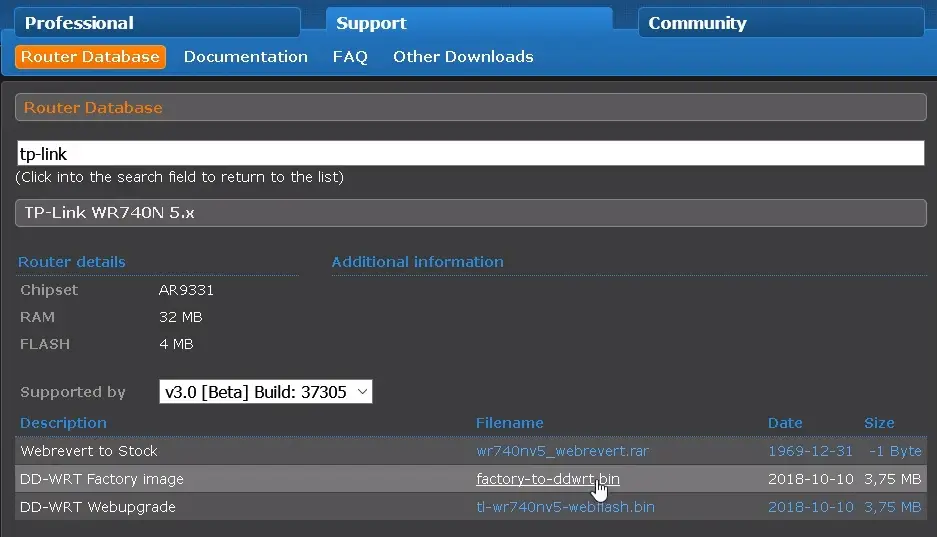
On the DD-WRT website, click on the router database first and then search for the TP Link router. Find the exact model of the router and it’s version. Router version is written on the bottom of router. Download the DD-WRT factory image.
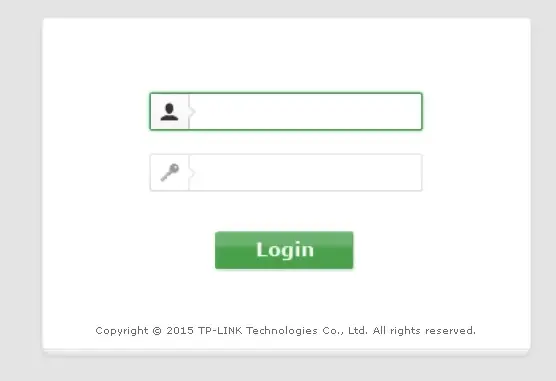
Now login to your TP Link router with an admin account. By default, address to the admin page is 192.168.0.1
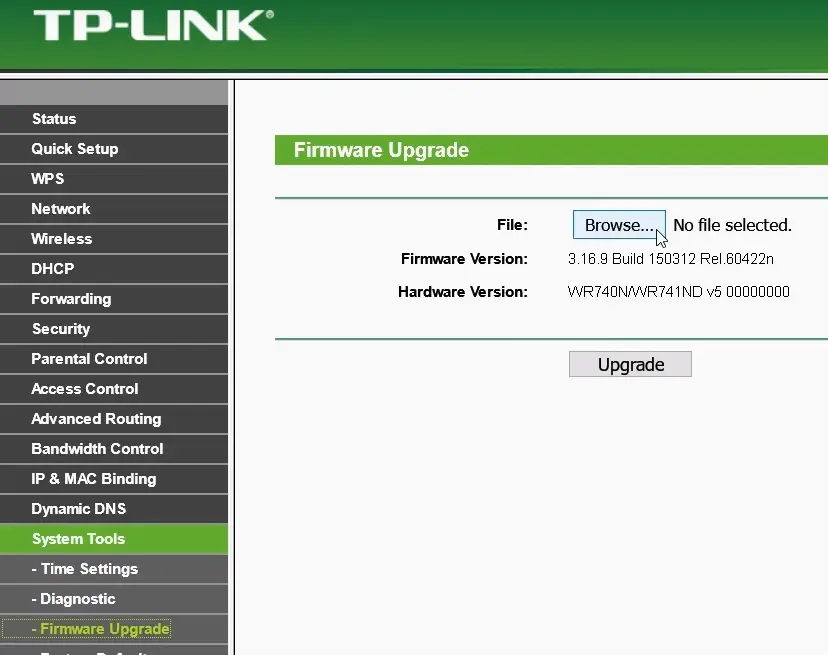
Flashing firmware on the TP-Link wireless router(install dd-wrt on tp-link router)
Go to system tools and then to firmware upgrade. Click on the browse button, locate the dd wrt image file and click upgrade. Wait for the upgrade process to finish.
Once the upgrade is finished, the router’s default IP address will change to 192.168.1.1.
So, you need to use the new IP address in order to access the router.
Finishing up
Once you access the router, DD-WRT will first prompt you to enter the new admin user name and password.
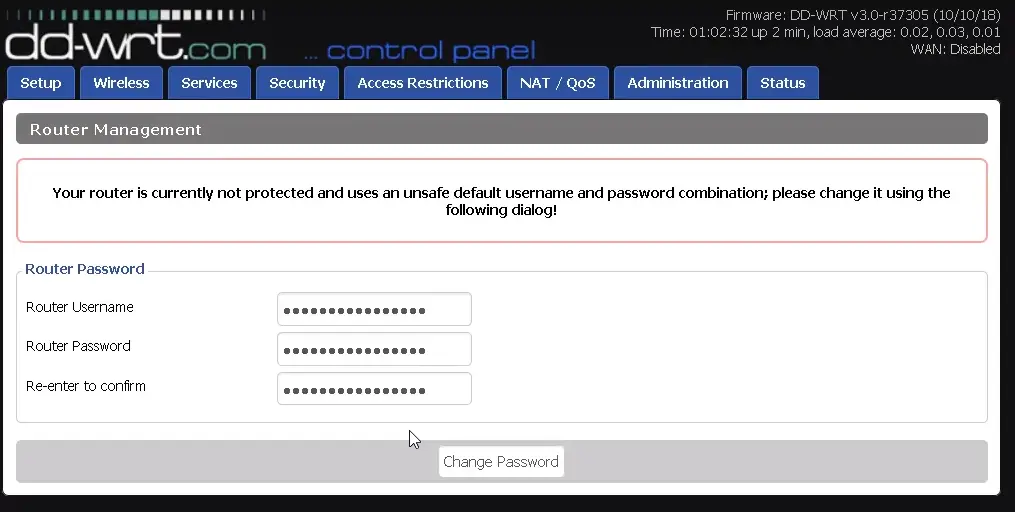
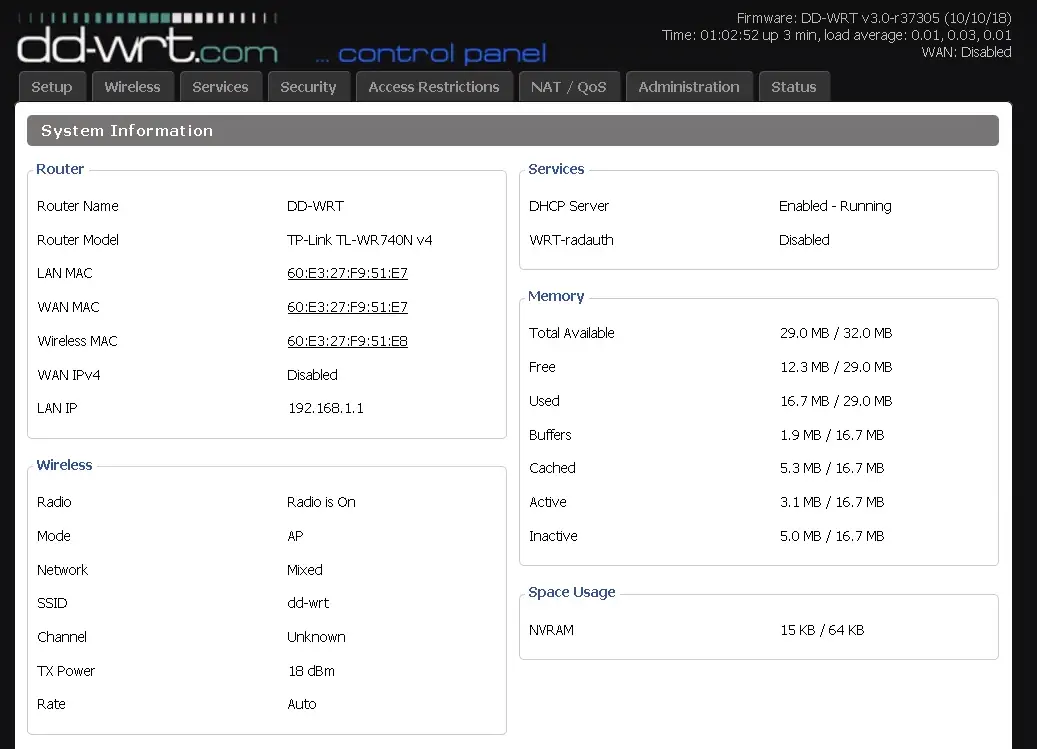
After that you will be greeted with the DD-WRT home page.
And that is it.
Summary
We went through the steps on how to install DD-WRT on TP-Link router. It’s a really powerful and quite useful piece of software and one of best features - it’s not resource heavy. It can be installed on less powerful devices that are supported by DD-WRT.
I hope you found the post useful and easy to follow. Thank your for your time.