How to setup NFS server on Debian 10[NFS share mount]
Overview
In this post, we’ll walk you through a process how to setup NFS server on Debian 10 and the process is same for Debian 11. Earlier on this site, we covered the other method as well where we showed the process mounting the network shared drive on Linux, but with this method we used cifs-utils tools(LINK). The principle behind this process is basically the same - mount a network shared folder or drive from another machine and access it via local network.
NFS server and client
NFS tools consists of the server application and client application. The server application, of course you install on the machine of which folder or drive you want to share over the network. The client application you install on all other machines from which you use to access the network shared folder/drive on the server.
One small note:
For this to work, your server machine needs to have a static IP address.
Debian NFS server setup
Install NFS server on Debian
On you server machine, run this command to install NFS server on Debian:
sudo apt install nfs-kernel-server
Next step - NFS server configuration. Run this command to access the NFS server config:
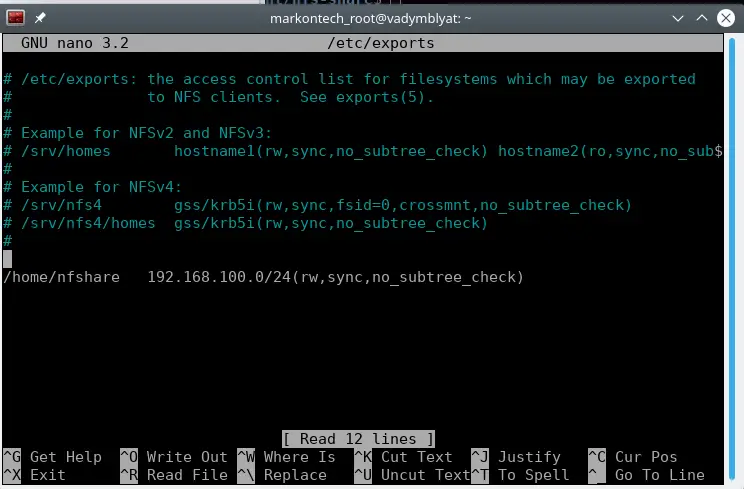
sudo nano /etc/exports
The configuration syntax needs to look something like this(the configuration line will explained in detail). I will explain the syntax more in detail bellow:
/home/sharedfolder 192.168.100.0/24(rw,sync,no_subtree_check)
Save the file and exit. Then run the command:
sudo exportfs -ra
And restart the NFS server:
sudo systemctl restart nfs-kernel-server.service
And that’s the NFS server configuration part. The file needs to look something like this:
Note for the shared folder
Also, for the folder you shared… if the folder was created by a root user, or with a user with the sudo privileges and from the client machine, you’re using an account which is not root - there could be read and write issues when accessing the folder from the client.
In that case, you should change the directory permissions and ownership of the server’s shared folder like this:
sudo chown -R nobody:nogroup /home/sharedfolder/
sudo chmod -R 755 /home/sharedfolder/
This means that the shared folder is not owned by any account or local group and has read and write permissions.
Another thing
If you’re running a ufw firewall on your server, then also we need to add a firewall rule in order that from the client machine we can access the shared folder. Run this command for the ufw firewall:
sudo ufw allow from 192.168.100.0 to any port nfs
The IP address needs to be of your IP pool.
NFS server configuration syntax
Ok, let’s cover the NFS server configuration. So, in previous paragraph I used this command as an example:
/home/sharedfolder 192.168.100.0/24(rw,sync,no_subtree_check)
This configuration syntax is for a scenario where you want for your NFS shared folder to be available on entire local network for anyone under 192.168.100.0 IP pool.
We’ll cover this syntax in detail:
- /home/sharedfolder - this is of course, the directory path of the folder you want to share over the network. This also can be any directory on the system(replace sharedfolder with the actual folder name)
- 192.168.100.0/24 - the IP address of clients/network pool and subnet mask. Above I already mentioned one case with the IP address where you want for the NFS shared folder to be accessed by any client on entire local network. In this case you need to know the IP pool of your router. This also can be configured so that only specific clients can access the NFS network share. For this to work, clients also needs to have a static IP address which you can assign by yourself. In this case a syntax would look like something like this:
- /home/sharedfolder 192.168.100.14(rw,sync,no_subtree_check)
- And if you need to have a scenario for multiple specific clients to access the NFS share, then you need to add multiple lines for each client individualy… like this:
- /home/sharedfolder 192.168.100.14(rw,sync,no_subtree_check)
- /home/sharedfolder 192.168.100.38(rw,sync,no_subtree_check)
- (rw,sync,no_subtree_check) - in this part, in between these brackets we are adding the share properties like client permissions and etc…
- rw -This option gives the client machine both read and write access to the shared folder.
- sync - This option forces NFS to write changes to disk before replying. This results in a more stable and consistent environment since the reply reflects the actual state of the remote volume. However, it also reduces the speed of file operations.
- no_subtree_check - This option prevents subtree checking, which is a process where the server must check whether the file is actually still available in the exported tree for every request. This can cause many problems when a file is renamed while the client has it opened. In almost all cases, it is better to disable subtree checking.
NFS client installation and mount Debian NFS share
On the client machine, run these commands to install the NFS client:
sudo apt update
sudo apt install nfs-common
Next step is to create a mount point on the client machine. Command bellow is used as an example. This can also be any location:
sudo mkdir /mnt/nfs-share
Now we can mount our NFS network share folder:
sudo mount 192.168.100.119:/home/sharedfolder/ /mnt/nfs-share
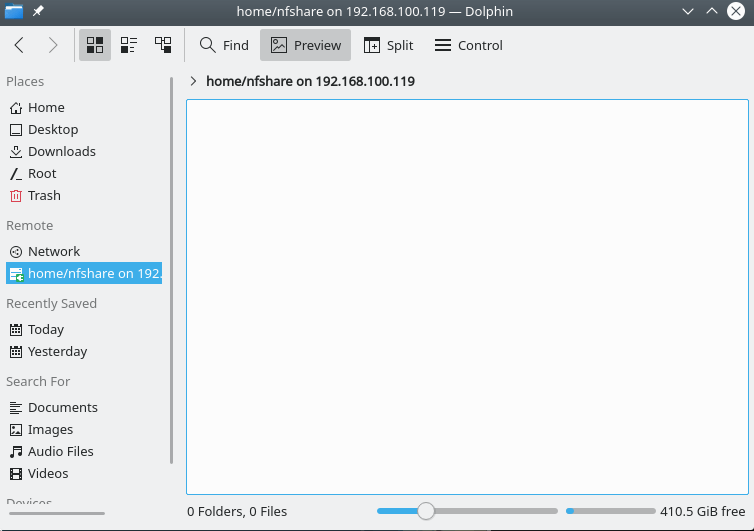
Again, the IP in the above command needs to be of your server and this command should mount the network share on your client machine. The shared folder should appear in the file manager right away… Like this(Example picture bellow):
Testing the Debian NFS share
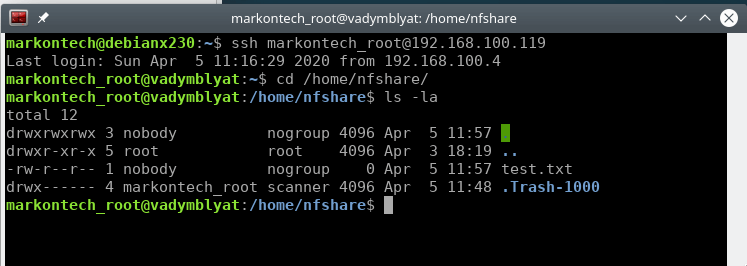
You can, of course, test the network share using the file manager and through the desktop environment . But, I also like to test the share via terminal. The method testing with the terminal is also good for scenario where you don’t have a monitor and accessing a remote server.
sudo touch /mnt/nfs-share/test.txt
This command will create a .txt file on our mount point and that file should appear right away on our server. Like in the pictures bellow:


Mount the Debian NFS share on boot
The mount command we used earlier - basically, that was a manual mount and it’s not permanent. Meaning that, as soon as you restart or turn off your client machine… the mount will be gone and you need to manually mount it again.
However, there’s a way to mount it permanently and that is with the configuration to mount the network share on boot. So, when your client machine boots up, it will automatically mount the network share.
This method is optional and you do it if you want to.
!!!PLEASE PAY ATTENTION ON THIS STEP!!!
If you don’t do it properly, you could lock up your machine on the next restart. Fstab file is the boot process configuration file which has your HDD’s in it as well. So, if the file is not configured properly, you could prevent the machine from booting.
On client machine, run this command to access the fstab file:
sudo nano /etc/fstab
Then… AT THE END OF THE FILE add this command line:
192.168.100.119:/home/sharedfolder /mnt/nfs-share nfs rw,soft,noatime,x-gvfs-show
It should look like this:
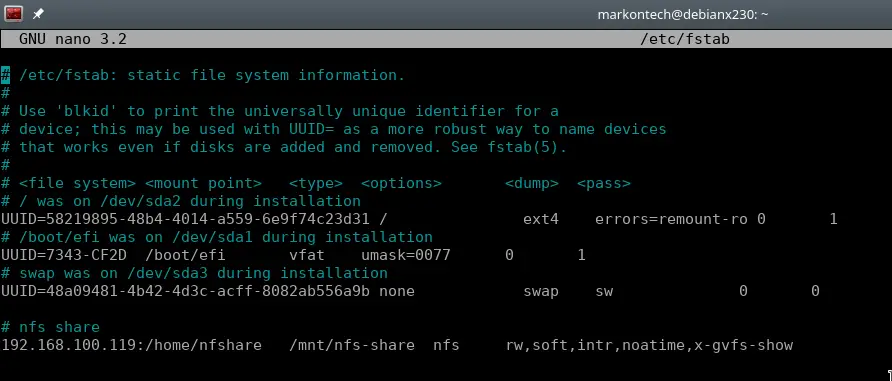
Save the file and exit. And that is it. The first two parts of the command tells the client to access the server and to mount the network shared folder on the client’s mount point. For this mount method, we used quite few mount options and properties and that is in order to make the mount stable as much as possible and avoid any read write issues. You can check the explanation of the option in the man page of the NFS on terminal:
man nfs
or on the web versions of the NFS man page - manpage1 and manpage2
Summary
That was the process on how to setup NFS server on Debian 10 and on Debian 11. Here, not only we covered the installation process of the Debian NFS server, we also have created the NFS share and configured the NFS share. In addition we covered the steps how to mount the Debian NFS share, and how to access the NFS share to be accessible for the clients on the network, and we also looked at some potential risks as well.
Thank you very much for your time.