How to Install Wireguard on Debian
Overview
On this post we are going to showcase the steps how to install Wireguard on Debian(this procedure works on Debian 10 and also on Debian 11). Wireguard is one of the well-known and a great open-source VPN solution. The scenario of our process on how to install Wireguard server is going to be performed as following:
- Deployed Debian 10(Debian 11) Linux machine with firewall(you can use UFW or IPTABLES. IPTABLES is used in this example).
- We’ll be using a Wireguard installation script from Github made by angristan. The Installation process done manually is not difficult but it can be time consuming(especially if you miss-configured a step which can consume more time by troubleshooting). For the simplicity and ease of setup we’re using the angristan’s script(big thanks to him for sharing the script).
Small side note - Besides this method, we also covered the procedure where install Wireguard server using Docker, which can be checked out on this post.
How to install Wireguard on Debian
Wireguard server installation
Download and run the install script from the Github repository:
curl -O https://raw.githubusercontent.com/angristan/wireguard-install/master/wireguard-install.sh

chmod +x wireguard-install.sh

./wireguard-install.sh

The script will ask you to provide it information in order to configure the Wireguard server. A screenshot bellow is provided with an example what information is required and what to provide it:

- Public IP address and ethernet interface:
- By default, the script itself should detect your Public IP address of your server and and the default Ethernet interface that it’s going to route traffic and it will display it. If the information is correct, hit Enter to continue.
- Wireguard’s port name and IPv4 and IPv6 Private subnet: These entries you can leave at default. They’re are the default Wireguard’s parameters where we’ll set the name for the Wiregurad’s ethernet interfaces and set the Wireguard’s Private IP address and the starting subnet for client devices.
- Port number: The port protocol number Wireguard uses in order to establish the connection to the client devices on it’s Public IP address.
- First and second client DNS resolver: This parameter will set the DNS resolvers(or DNS servers) which client’s will use once they connect on the server. The script will initially suggest and will display already an IP address for a DNS to use for clients. The suggested IP address is from AdGuard service which protects clients and blocks trackers and phishing attacks. You can the entry and use the suggested DNS or enter one which you prefer.
After the DNS entries, the script will start to install and configure the Wiregaurd.
Client configuration
After the server configuration is done, the script will prompt you for client configuration and it will only the two things and that is:

Client name and the client’s private IP address: For the IP address you can leave it at default, since it will suggest and set the IP addresses numerically.
The rest of the client setup will be done automatically by the script and in the you should get the result like in the following picture, with the QR code listed for ease of client setup:

Client config retrieval
After the client config setup, download the .ovpn client file(you can use a SSH client with integrated file manager such as MobaxTerm or Bitwise or similar.) On Linux you can download the file with sftp:
sftp [email protected]

get client_config.ovpn
The file will be download to your home directory.
Connecting to the Wireguard server
Once the installation is done, you may get this message that the Wireguard VPN service is not running:

If you get this message, just run the command from bellow to start it and have start automatically on boot:
sudo wg-quick up wg0
or start it as a service and enable it(suggested if you plan to have it running 24/7):
sudo systemctl start wg-quick@wg0

sudo systemctl enable wg-quick@wg0
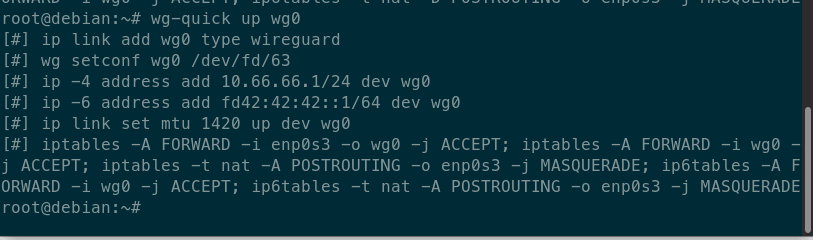
To be sure that the Wireguard server is running, you’ll get an output like in the picture bellow once it starts:
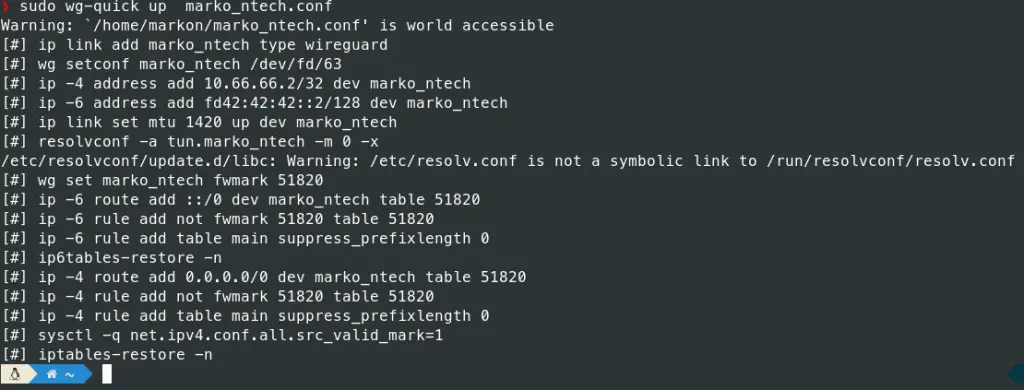
To establish the connection from the client to the server, on the client machine, install the Wireguard client(for each individual distro you can find instructions on their site) and run the following command to connect:
client sudo wg-quick up client_config.conf
You should an output like this for a successful connection:
And that is it!
Firewall configuration
If you’re running a firewall on your server such as UFW or IPTABLEs, then it’s a must to open a port on your server in order for VPN to work:
UFW

sudo ufw allow 49756

IPTABLES(for TCP)

sudo iptables -I INPUT -p tcp -m tcp --dport 49756 -j ACCEPT

or

sudo iptables -A INPUT -p tcp -m tcp --dport 49756 -j ACCEPT

IPTABLES(for UDP)

sudo iptables -I INPUT -p udp -m udp --dport 49756 -j ACCEPT

or

sudo iptables -A INPUT -p udp -m udp --dport 49756 -j ACCEPT
Summary
To summarize the article – we went through the process on how to install Wireguard on Debian 10 and on Debian 11, using an auto-install script from Github, which speeds up and simplifies the process. The reason we choose this script is because it can help us deploy the Wireguard server solution in matter of minutes and it also covers and automates the most of the configuration for the most common use case scenarios.
Thanks for your time…