How to dual boot Windows 10 and Linux Mint
Requirements
This post will cover the process on how to dual boot Windows 10 and Linux Mint.
For this example, it is required that you have Windows 10 already installed. In most cases it is recommended to install a Linux distro after the Windows 10 installation, because of the bootloader. Linux bootloader will detect another operating system installed and add the other operating system in the bootloader entry - this process is done automatically by the GNU/Linux installation. Also this example will cover the process if you only have one partition on your HDD and check you PC how it boots(UEFI or Legacy) and make sure both OS are installed in the same mode.
Before starting the process I recommend to backup any important data you have.
Requirements for this process:
- Linux Mint bootable USB
- Free space on you HDD or second HDD(even better).
Bellow is a video tutorial for this process as well:
Creating partition for Linux Mint installation
First we will start with creating a new partition for the Linux Mint. For this step you can use any third party partition tool but in this example, we used windows disk management. So, first step is to run the disk management app by right clicking the start menu and then to choose option - Disk management.
When the app loads up, on the bottom of the app you will have a list of all your connected drives. We’re going to use and edit the Windows partition, which in most cases is a C: partition. You can also do the same step if you have another partition. Please do note that you need to have free space available on your partitions.
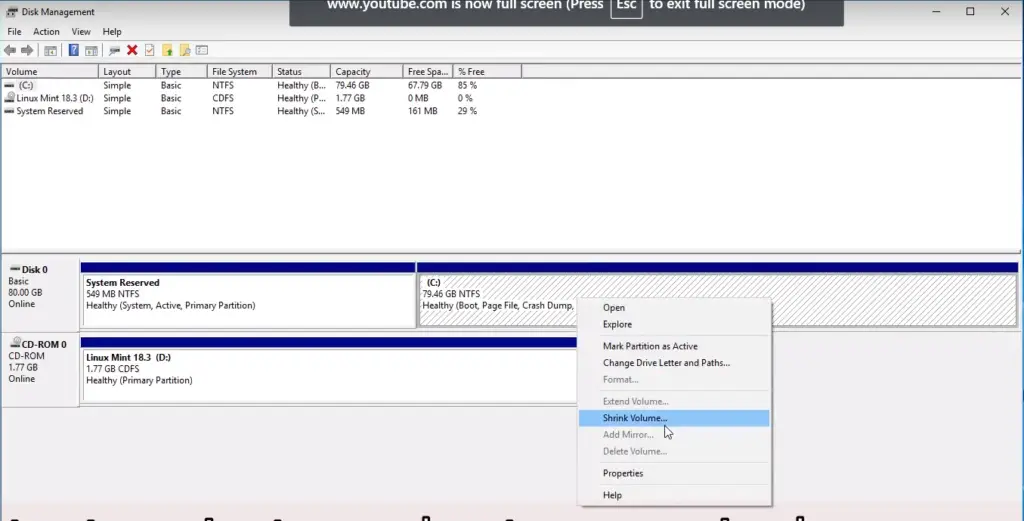
Select your partition, right click on it and select option - Shrink volume.
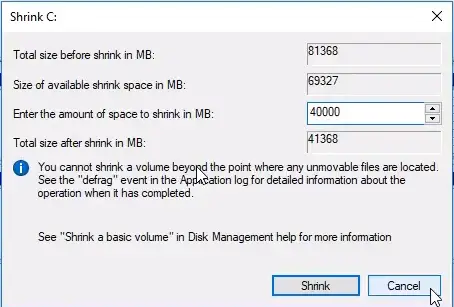
A prompt window will open in which you need to split the partition and allocate space to your new Linux Mint partition. In the field labelled - Enter the of amount of space to shrink in MB. You need to enter the size of new partition in megabytes. After that, click on the Shrink button and the partition is created.
Next step is to plug in your bootable Linux Mint USB on your PC, restart the PC and the boot the installation.
Linux Mint installation
The installation will boot the Live installation automatically. You will get the Cinnamon desktop. Run the - Install Linux Mint.
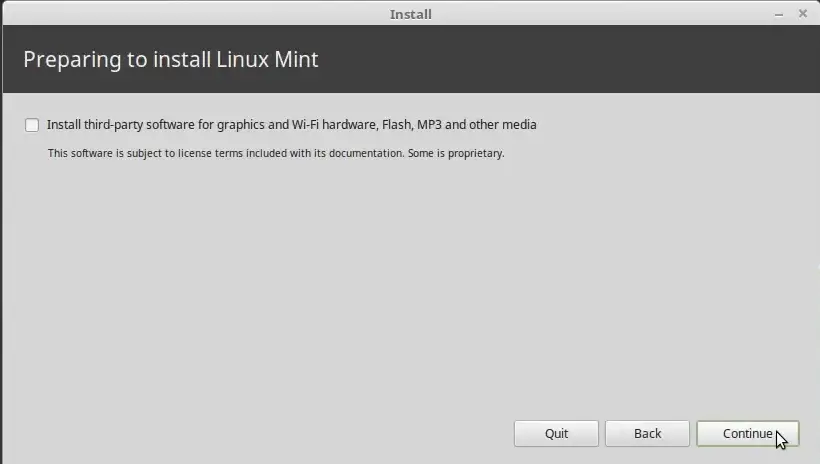
Installation setup window will start and prompt you with options. First screen is to choose the language. When you go to the next screen, it will ask you want to install third party software. This is optional, you can do it later, but if your PC/Laptop is connected on the internet, you can check the option and the installation will install all the necessary software right away automatically.
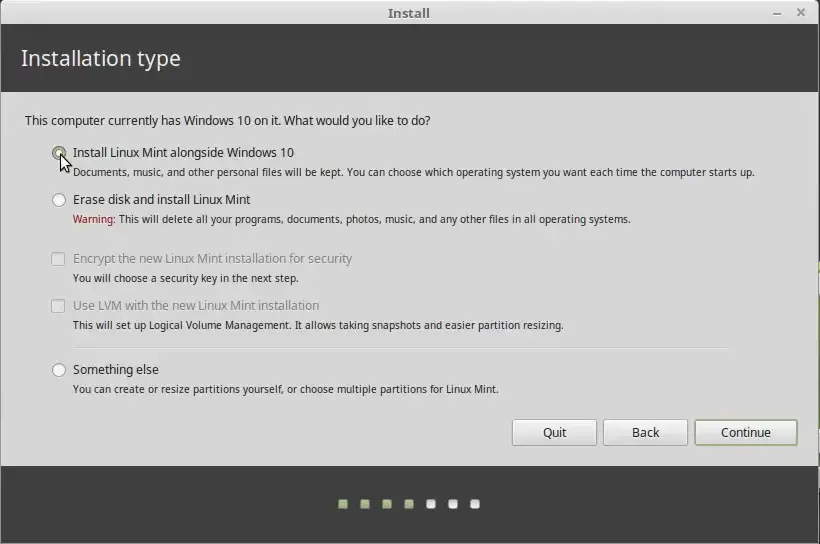
Now here comes the important step. Here we need to setup the dual boot option. This is setup for Linux Mint partitions. The screen will first offer you couple of options how to proceed with the installation and how the installation will install system on your PC. The most simple and easiest is the first option - Install Linux Mint alongside Windows. I usually go for the something else option, but that one has more steps and this time I want to cover how to install Linux Mint as simple as possible since this tutorial is for the beginners.
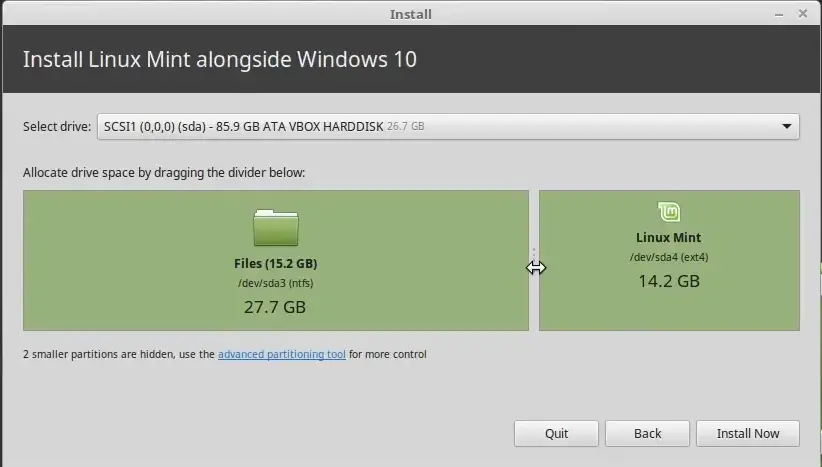
Formatting Linux Mint partition
So, select the first option - Install Linux Mint alongside Windows and click continue. The next screen will prompt you how will installation format the partition and how much of space will go for the system and how much for your personal files. The installation will automatically select your newly created partition which has free space. In the middle there is a graphical display of your partition - a green bar which has a separator line in the middle. Slide the separator how you want in order to allocate space to your system. Right side of the bar is for your system and the left is for personal files. If you want your system to have more space, slide the bar to the left to allocate more space to system.
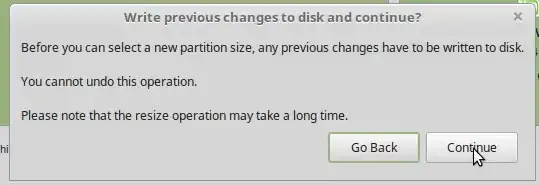
When you finish with partitioning, click Install Now. Before it proceeds it will prompt you to be sure you want to continue with changes. Click on Continue again.
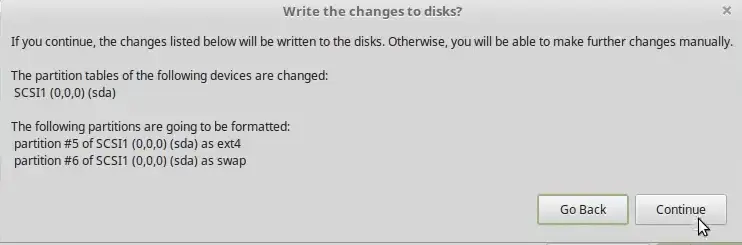
You will get another prompt that will ask you do you want to continue with writing changes to the disk. Again click continue.
Installation will now install the system. Installation will run in the background. While it’s running, it will offer you to finish with other part of the setup - user creation and etc.
Finishing up installation and user account creation
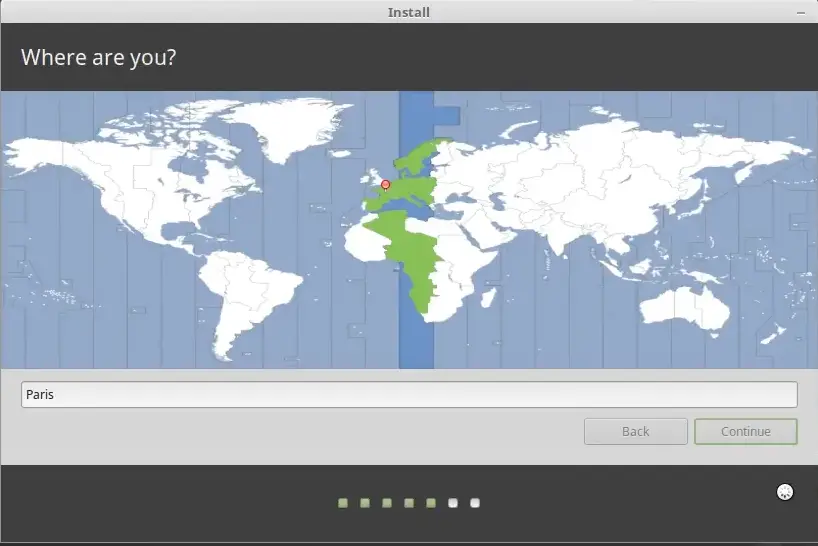
First it will ask you to choose your country.
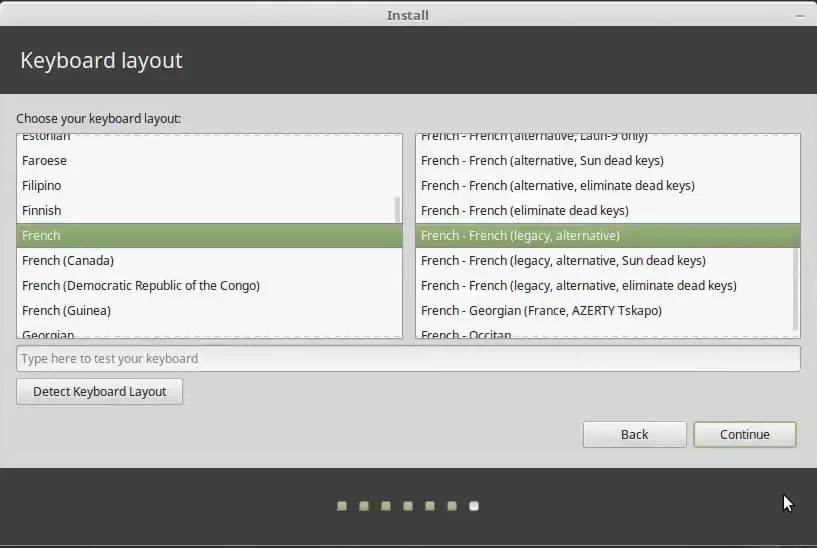
On this screen you need to choose the keyboard language and choose the keyboard layout.
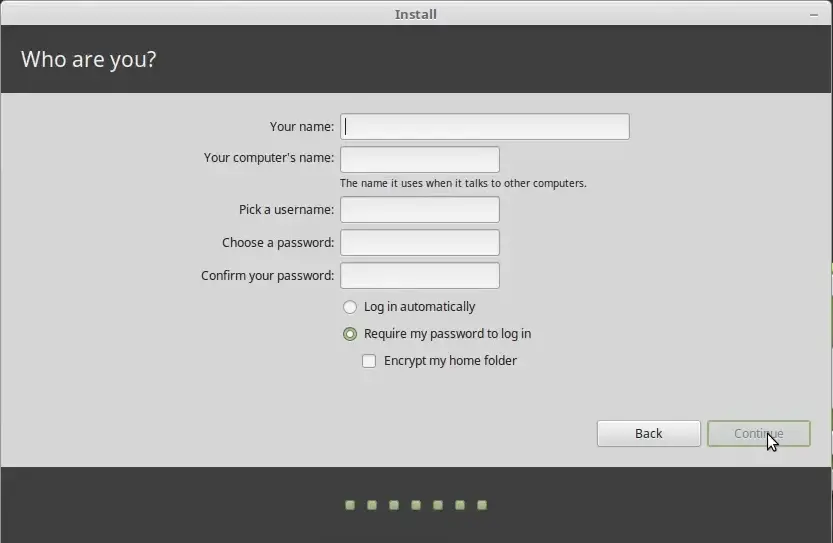
And on this screen you need to setup your user account and enter the computer name.
When finished, click continue. The installation will take same time.
You’ll get a prompt once the installation is finished. When you see it, remove the installation USB and restart the PC.

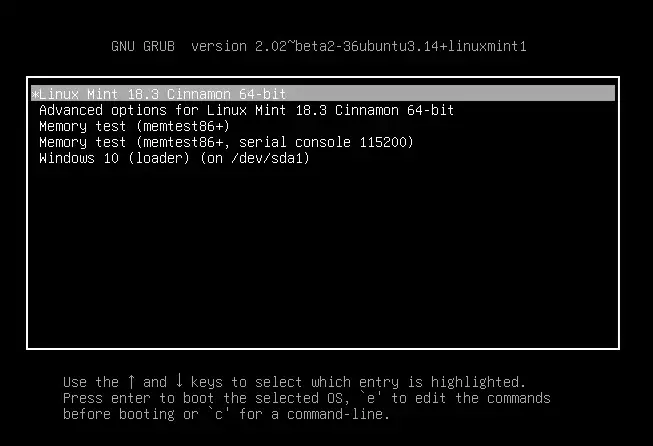
You need to have a bootloader menu like this when the PC starts to boot up. On this menu you will choose which OS you want to boot, Windows or Linux Mint.
Summary
To summarize the article - we have showcases the steps on how to dual boot Windows 10 and Linux Mint.
If you ever encountered with Linux distro Ubuntu, you probably noticed that Linux Mint installation is like from a Ubuntu. That’s why Linux Mint is based of Ubuntu. Disregarding that, Linux is still an excellent distro, favored by many and since it has a Windows like desktop environment, one of the best for beginners who transitioned from Windows and started to learn Linux.
That was the process. I hope you find it useful and the process was easy to follow. Thank your for your time.