Overview
Urbackup is a cross-platform server/agent backup solution. Quite versatile, feature rich and available on many platforms. We already covered how to install Urbackup on distros such as Ubuntu and Debian and in this post we’ll cover the procedure on how to Install Urbackup server using Docker or in other words - how to deploy Urbackup server as a Docker container.
Prerequisites:
A Docker node/server with Docker engine installed and running.
We also covered the standard Urbackup install with it’s binaries on Debian/Ubuntu.
How to Install Urbackup server using Docker
Docker container options
The following paragraph will showcase the Docker options which are necessary in order to run the Urbabackup as a Docker container:
- Docker command with environment variables:
docker run -d --name urbackup-server-1 -v /media/backups:/backups -v /media/database:/var/urbackup -p 55413-55415:55413-55415 -p 35623:35623/udp uroni/urbackup-server
For BTRFS-Support add “–cap-add SYS_ADMIN” to the command above(BTRFS file system support)
- Docker compose file:
version: '2'

services:
  urbackup:
    image: uroni/urbackup-server:latest
    container_name: urbackup
    restart: unless-stopped
    environment:
      - PUID=1000 # Enter the UID of the user who should own the files here
      - PGID=100  # Enter the GID of the user who should own the files here
      - TZ=Europe/Berlin # Enter your timezone
    volumes:
      - /path/to/your/database/folder:/var/urbackup
      - /path/to/your/backup/folder:/backups
      # Uncomment the next line if you want to bind-mount the www-folder
      #- /path/to/wwwfolder:/usr/share/urbackup
    network_mode: "host"
    # Activate the following two lines for BTRFS support
    #cap_add:
    #  - SYS_ADMIN
Deploy Urbackup server as a Docker container
For the purpose of this example, we’ll run the Docker command in order to install Urbackup server.
Prior running the command first, we’ll review the command and explain what each environment variable represents:
-d –name urbackup-server-1 - Set a container name and configure it to run in detach mode(meaning it will run in the background constantly)
-v /media/backups:/backups - Set a backup directory to mount on your host which will Urbackup use to store all your files and backups, VERY IMPORTANT TO SET. This is usually a default but it can be any other directory you choose and it can be a mounted remote storage path as well.
-v /media/database:/var/urbackup - Urbackup database directory path to mount on your host for Urbackup to store all it’s settings.
-p 55413-55415:55413-55415 - Exposing Urbackup web dashboard port
-p 35623:35623/udp - Exposing Urbackup agent port - important also, this port Urbackup is looking for and using to connect to the Urbackup server
uroni/urbackup-server - name of Docker image from the Docker Hub
By default, this Docker container configuration of Urbackuo doesn’t come with BTRFS file system support, so if you do require it, just add the environment variable in the command - ”–cap-add SYS_ADMIN”. The command with BTRFS in the end should look like this:
docker run -d --name urbackup-server-1 -v - - cap-add SYS_ADMIN /media/backups:/backups -v /media/database:/var/urbackup -p 55413-55415:55413-55415 -p 35623:35623/udp uroni/urbackup-server
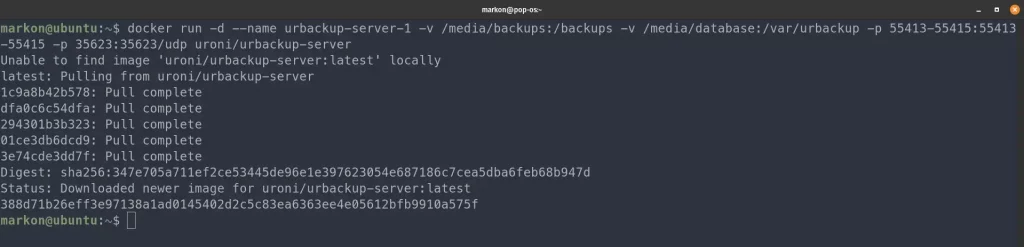
Urbackup server Docker container deployment
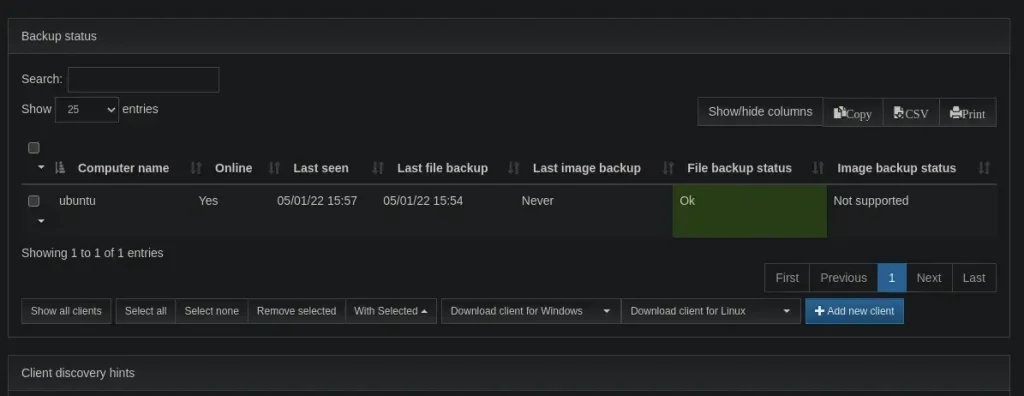
Once the Docker container is deployed, you should be able to access the Urbackup dashboard right away on your browser. Web dashboard run on the 55414 port and it should be accessible via the “public IP” address of your Docker host(Example in the picture bellow):
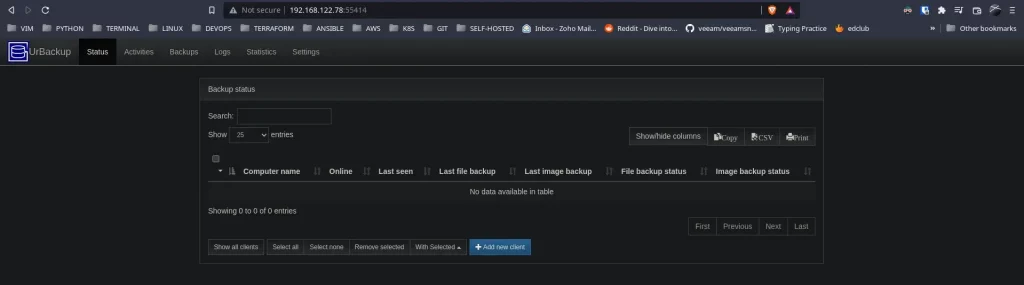
Urbackup server main dashboard
Adding a Urbackup client
Installing and adding a client is rather simple and Urbackup offers multiple ways to add a client to the server. The client app install can be also generated from the server dashboard, which is quite useful. Most of the methods we’re going to cover are with using the auto install scripts. All methods can be looked on the official Urbackup documentation.
- First option:
On the client machine, run the following auto install script:
TF=$(mktemp) && wget "https://hndl.urbackup.org/Client/2.4.11/UrBackup%20Client%20Linux%202.4.11.sh" -O $TF && sudo sh $TF; rm -f $TF
After the install is done, return to the server dashboard, click on the “Add client” button. Server will redirect you to another page and ask to enter the client info and choose whether to scan the local network and auto detect the client or is it public client located on the internet or behind a NAT. You can choose the option which corresponds more to your environment but this option will work best with the second choice “Discover the client by IP/hostname”. Enter the IP address of the client and click “Add client”

Add client setup menu with “Discover client via IP/hostname”
- Second option:
Is by first going to the “Add client” page and selecting the first option “Add new internet client/Client behind NAT”. This method works for the private/internal LAN network and via Internet as well. By selecting this option, Urbackup server will generate the auto install scripts for the client.
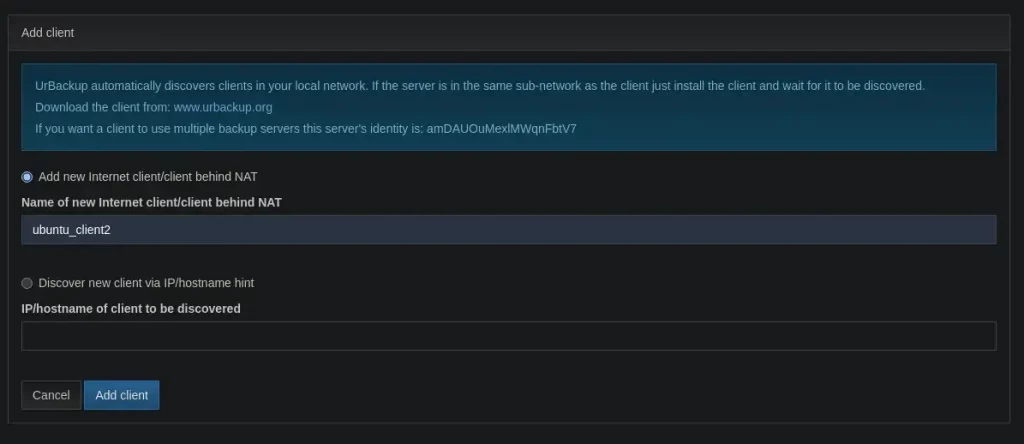
Add client setup menu with “Add new internet client/NAT”
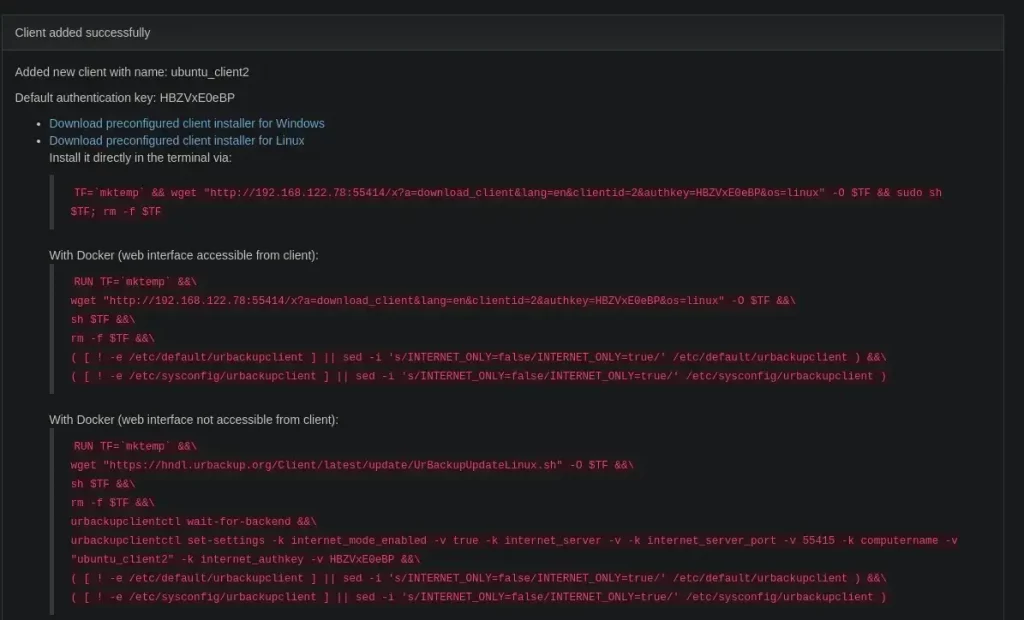
When you click on the “Add client”, the following page will provide three auto install scripts to choose from - go with either the first or second option: install directly in the terminal or install with Docker. Copy and paste either of those commands on your client machines and the Urbackup will install and should be added automatically on the Urbackup server dashboard.
- Third option:
Is by generating and downloading the install script from the main Urbackup server dashboard by clicking on the button “Download client for Linux”. Then copy the script to your client machine and run it and it will install the client again.
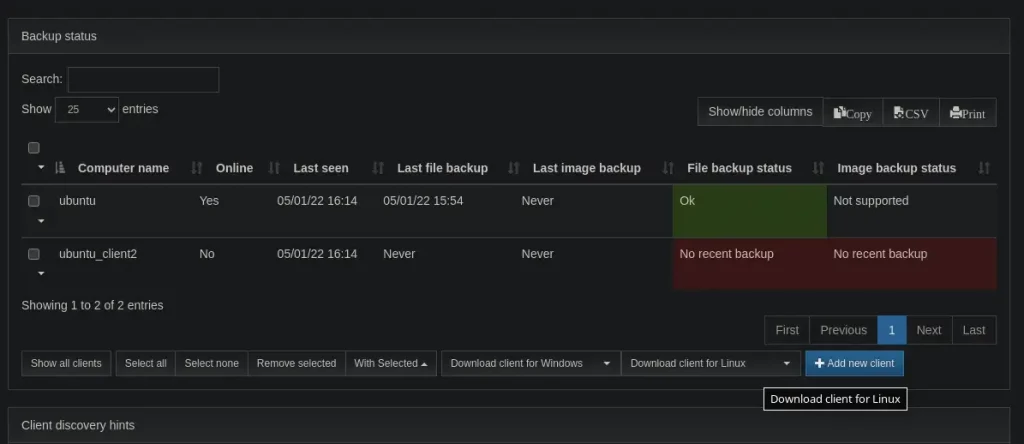
After the clients are installed and added on the server, leave it for couple of minutes in order for the client to sync in with the server and try to run any backup job on the server.
End result when a new client is added and when a client is backed up should look like this:
Summary
This concludes the procedure of how to Install Urbackup server using Docker. The article covered the steps how to deploy the Urbackup server as a Docker container and reviewed the various methods of adding the Urbackup clients.
Thank you for your time…