This article will act as a guide for a procedure - how to setup NFS server on Alma Linux or in another words and how to create an NFS share on Alma Linux. NFS stands for Network File System is a network file sharing protocol that allows you to share files and directories over the network. You can mount the file systems over a network and use them as your local drive. NFS server is a client-server architecture where multiple clients can mount the shared drive from the NFS server and share resources between Linux systems. By using NFS, you can save space and the cost of storage, especially when you are using cloud instances.
For the purpose of this guide, the article will showcase the procedure on a cloud VPS machine but the same method can be applied on local network as well..
Prerequisites
1. A server running Alma Linux and having a static IP address with root privileges.
2. NFS client running with sudo privileges.
How to setup NFS server on Alma Linux
Step 1: Update OS
Before starting the NFS server installation, update your base system by executing the following command:
sudo dnf update -y
Step 2: Install and configure NFS Server
On your server system, install “nfs-utils package” by running the following command:
sudo dnf -y install nfs-utils
Now start the NFS service and enable it to auto-start at system boot time, then verify the NFS service status with the following command:
systemctl start nfs-server.service
systemctl enable nfs-server.service
systemctl status nfs-server.service
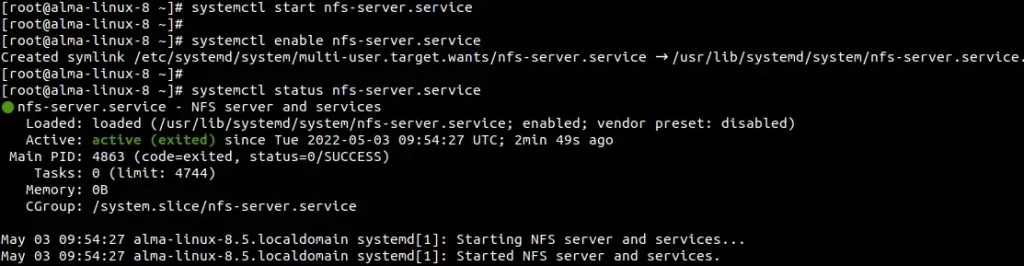
NFS server service
Step 3: Create and Export NFS share Directory
Next, you need to create an NFS share directory on your NFS server that you want to access on your client’s system. Execute the below command to create a shared directory:
mkdir -p /mnt/nfsshare
Now, create some files into that shared directory:
touch /nfsshare/file1.txt
touch /nfsshare/file2.txt
Next, Set proper permissions on the “nfsshare” directory:
chown nobody:nobody /mnt/nfsshare
chmod 755 /mnt/nfsshare

NFS share directory setup
Step 4: Configure the Export Directory
Now, edit the NFS server configuration file and define the path of the directory that you want to share. To edit the file, run the following command:
vim /etc/exports
Now add the following line:
/mnt/nfsshare 188.166.51.227(rw,sync,no_subtree_check)
Here, You need to replace the IP address with your client’s IP address. You have to define permission for each client.
rw: The client can read and write on the shared directory.
Sync: This will reply to requests only after the changes have been committed to stable storage.
no_subtree_check: Do not check subtree.
To verify the export, the list executes the below command:
exportfs -s

NFS export
Configure the Firewall on the NFS server
Alma Linux comes with firewall enabled by default and it may not allow you to establish the connection via NFS, so just to be sure, run the following firewall command to allow NFS traffics:
sudo firewall-cmd --permanent --add-port=2049/tcp
sudo firewall-cmd reload
Step 5: Install and Configure NFS Client
Next, you need to install the following packages on your client system to configure the NFS client:
sudo dnf install nfs-utils nfs4-acl-tools
After installation, start and enable nfs-client service on the client system:
sudo systemctl start nfs-client.target
sudo systemctl enable nfs-client.target
To verify the service status, run the following command:
sudo systemctl status nfs-client.target

NFS client service
Now, on the client system, you can see the mount information of the NFS server using the following command:
showmount -e 104.248.81.208
Note that you need to replace the IP address with your NFS server IP address.
Now, create a directory and mount the remote shared directory on that directory using the following command:
mkdir -p /mnt/nfs_mount
mount 104.248.81.208:/mnt/nfsshare /mnt/nfs_mount
Next, verify the NFS mount using the below command:
df -h
You should see output like below:
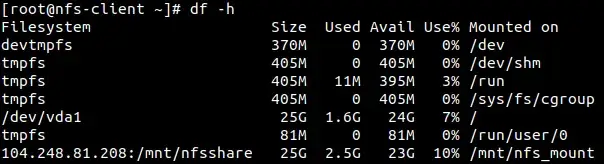
NFS mount
You can see that your NFS drive mounted successfully.
Next, If you want to mount your NFS drive Permanently even after a system reboot, then update /etc/fstab the file on your client system.
vim /etc/fstab
In the “fstab” file, add your NFS mount point, AT THE BOTTOM OF THE FILE, as shown in the below command:
104.248.81.208:/mnt/nfsshare /mnt/nfs_mount nfs defaults 0 0
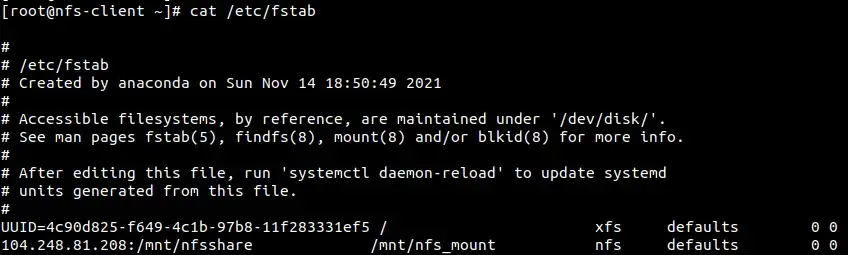
NFS fstba entry
Now, verify your NFS share drive working by creating a file on the NFS client by running the following command:
touch /mnt/nfs_mount/test_file1.txt
Then, go to your NFS server shared directory and execute the below command:
ll /mnt/nfsshare/test_file1.txt

NFS share mount test
Summary
Let’s summarize. We have successfully setup NFS server on Alma Linux and you also enabled access to the NFS share from the client machine. Configured the client and also configure that NFS share is mounted automatically on boot. Don’t hesitate to ask any questions if you have.
Thank you for your time…