Overview
Hi! I hope you’re all well and prepared to learn some new stuff. This time we’ll go through the basics of how to set a static IP address in Linux. In case that this stirs a question is there another type (let’s say dynamic, perhaps?), answer is yes, there is! There is a protocol for assigning dynamic IP addresses called Dynamic Host Configuration Protocol or DHCP shortly. Most likely that you have a dynamic IP address assigned by your router in home environment!
Surely, some of you with inquisitive minds will now wonder, following the golden rule of IT “if it works, don’t touch it!”, why to change it from dynamic in the first place? Well, the thing with DHCP is it’s assigning IP address for a limited time. While that is not troublesome when it comes to average computer, but it’s very important when it comes to servers, gateways or network storage to name a few.
Static and dynamic IP address assigning both have advantages and disadvantages, but that is out of scope of this article, so if you’re interested to know more on that topic, you’ll have to use the most powerful tool you’ll use until the very end of your professional career and most likely until the end of your life – Google.
In this article will be shown how to set a static IP address in 3 Linux distros:
- Ubuntu
- Debian
- Fedora
For those of you who are puzzled why have I separated Ubuntu from Debian, since Ubuntu is Debian based, the reason is that guys at Canonical (owners of Ubuntu) switched to different method of configuring network. Oh, I forgot to mention, in this tutorial we’ll use Ipv4 (Internet Protocol version 4).
Set a static IP address in Ubuntu
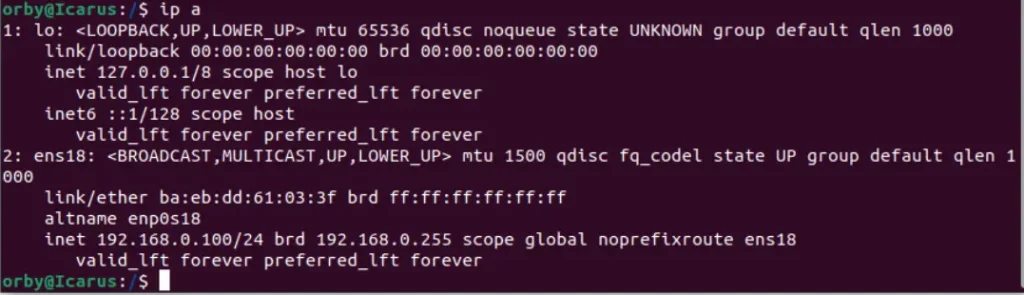
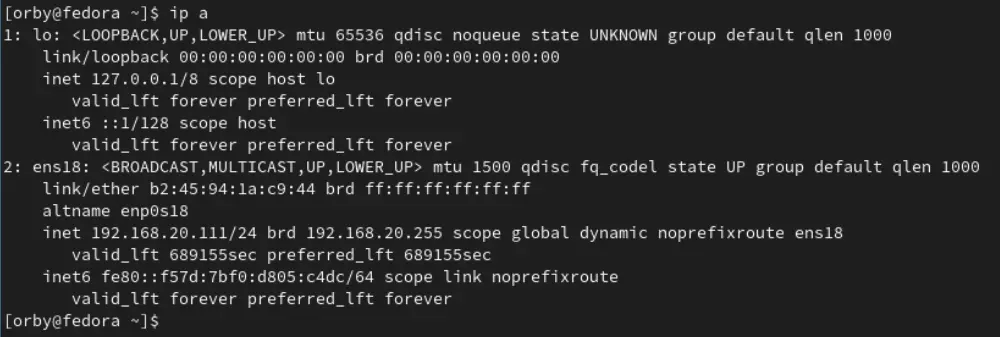
As of version 17.10 Ubuntu switched to Netplan and we’ll cover that way of setting a static IP address. First, let’s check the name of active network interface we want/need to configure. Open terminal and type:
ip a
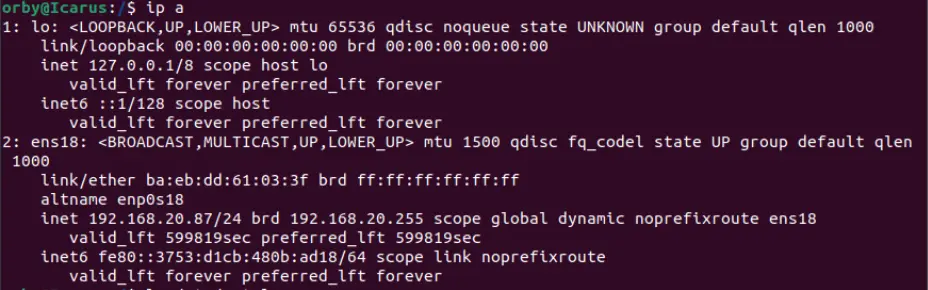
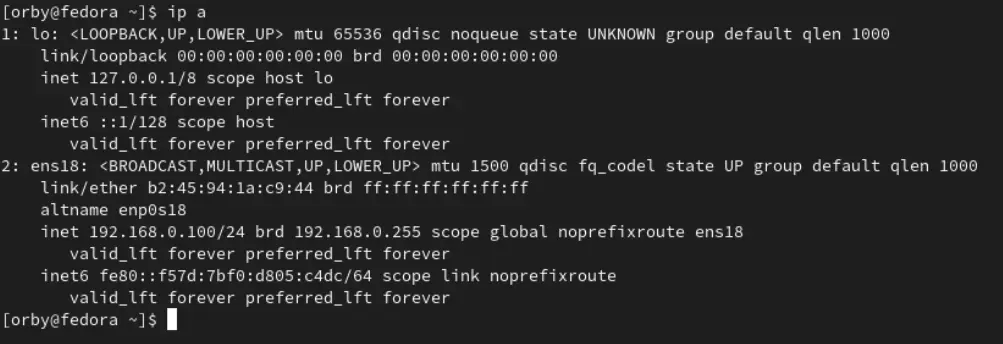
At number 1 is just a loopback interface, so interface at number 2 is the one we will focus on. In my case it’s name is ens18, while name of yours can differ (enoX, enpXsY, ethX – where X and Y are substitues for numbers). Next thing in line is to check the content of /etc/netplan folder.
ls /etc/netplan

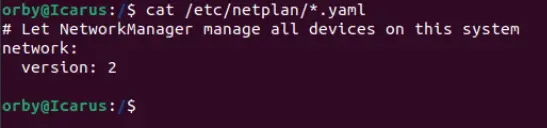
In my case there is a file named 01-network-manager-all.yaml (in some versions there is file 01-netcfg.yaml). To take a peek in it’s contents, type:
cat /etc/netplan/*.yaml
We need to open that file in a text editor so we can reconfigure it and we need to do it in superuser mode, so we type:
sudo nano /etc/netplan/*.yaml


You need to populate this file and make sure that you indent text (best way with Tab key) as it is shown in example:
network:
    version: 2
    renderer: NetworkManager
    ethernets:
        ens18:
            dhcp4: no
            addresses: [192.168.0.100/24]
            nameservers:
                addresses: [8.8.8.8,8.8.4.4]
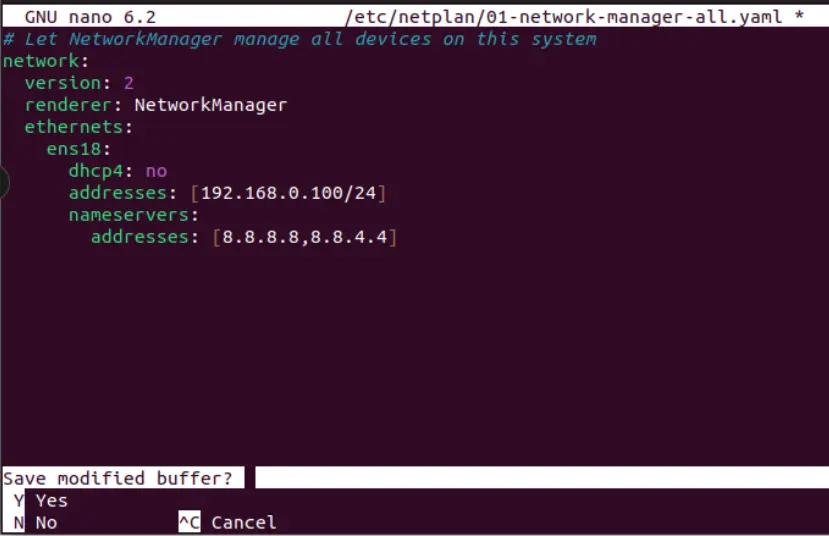
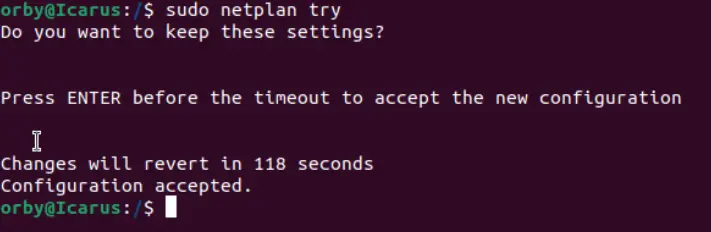
Ctrl+X to save, Y to confirm it and Enter to save it under the same name. Needless to say, your IP address will differ from mine. Also, under namerservers addresses I entered Google’s public DNS’s (8.8.8.8 and 8.8.4.4), you enter DNS for your network or use Google’s just like I did. To test what have we just done, type:
sudo netplan try
Everything seems to be in order, so next step is to apply those settings with this command:
sudo netplan apply

If everything went smoothly, there is only one thing left to do – to restart NetworkManager and you can do it typing:
sudo systemctl restart NetworkManager
So, when you check up on your interface it should look a bit like this:
In case you encountered errors, you can try debugging to solve them. So, in that case you’ll have to use command:
sudo netplan –d apply
Set a static IP address in Debian
Just like we did in Ubuntu, first we’ll check for network interfaces with a command:
ip –a addr
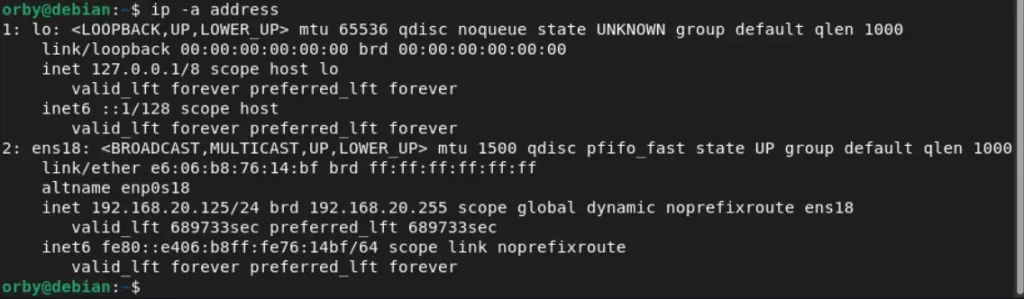
Or you can use a little fancier approach:
ip –c addr show
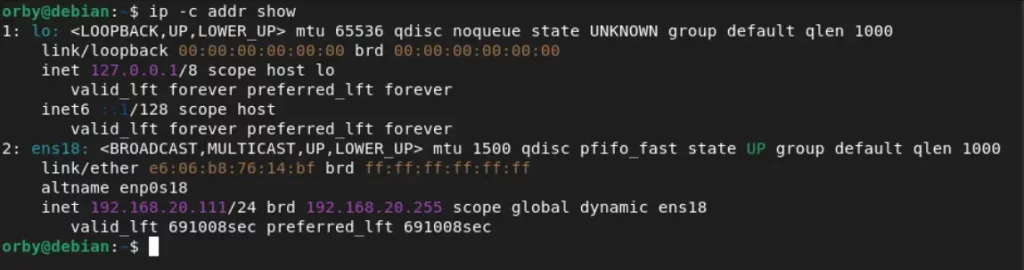
You have to admit it looks more appealing. There is also a way to focus on desired interface:
ip –c addr show ens18

In Debian, network config file is located in /etc/network, so we type:
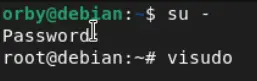
sudo nano /etc/network/interfaces

Uh oh!

If you’re greeted with this awkward message, don’t be discouraged. We’ll fix it in a jiffy. Type:
su –
Then enter your password and you’ll be switched to root account. Next what you need to do is type:
visudo
Once inside text editor search for line “root ALL=(ALL:ALL) ALL” (without quotes, of course)
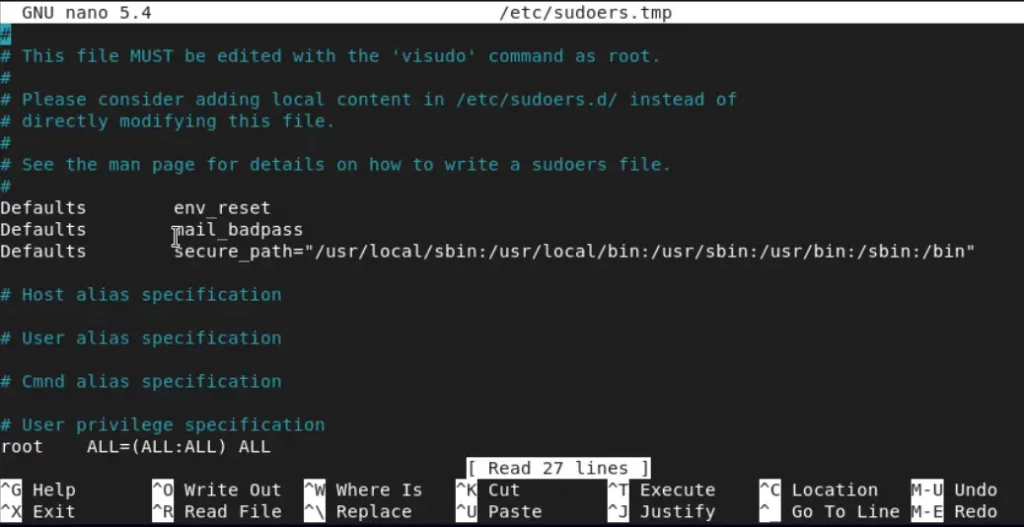
and under it type”
<your-username> ALL=(ALL:ALL) ALL – where by <your-username> I really mean your actual username.
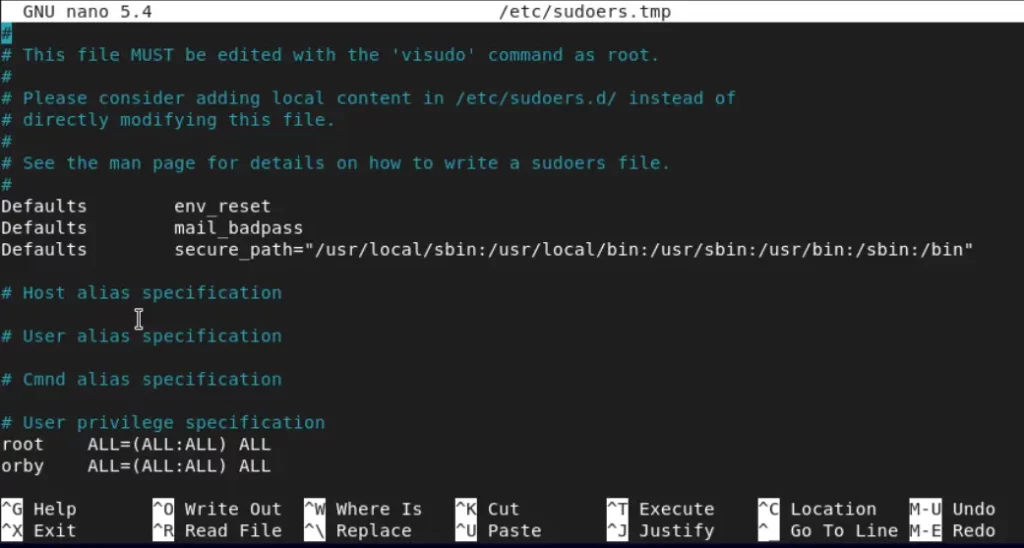
Save and exit text editor. Exit root account. You’ll have to log off and log back in (or restart the system) for changes to be applied. Now let’s try again:
sudo nano /etc/network/interfaces
…and we’re in!
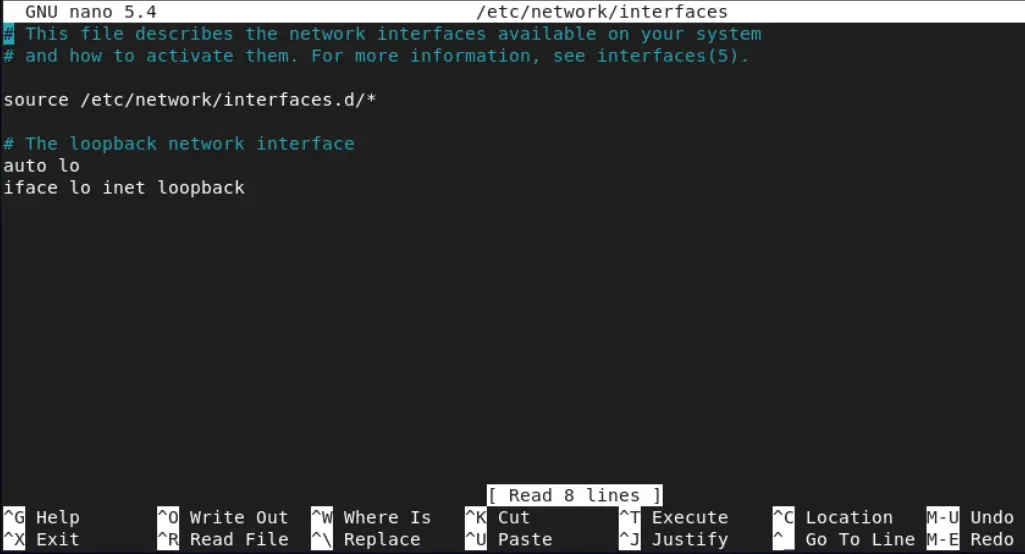
No time to waste, let’s use this new powers. Once again we have to do some typing to populate a file. Under iface lo inet loopback start typing:
# The primary network interface
auto ens18
iface ens18 inet static
address 192.168.0.100
netmask 255.255.255.0
gateway 192.168.0.1
dns-nameservers 8.8.8.8
dns-nameservers 8.8.4.4
Ctrl+X, press Y and Enter to overwrite. You have one more thing to configure, your DNS servers and that you’ll do this way:
sudo nano /etc/resolv.conf

Once again, ctrl+X, Y and Enter. You’re done with configuring, so the only thing left is to type:
sudo systemctl restart networking.service
And, once again you’ll have to re-log or restart for changes to take effect. After you’re back in, jump in terminal and see the result:

Set a static IP address in Fedora
The last but not the least – Fedora. First thing to do is to check network interface, just as we did in previous examples. To do so, we type:
ip a
My network interface is on the list, so I can proceed. If you would like to get a more complete report type:
nmcli
Next step is configuring part. Unlike Ubuntu and Debian, in Fedora we do it directly in command line:
nmcli connection modify ens18 ipv4.address 192.168.0.100/24

Well, this is weird. Why doesn’t Fedora recognize my network interface? We’ll have to dig a little deeper. Let’s see the reason for such behaviour. Type:
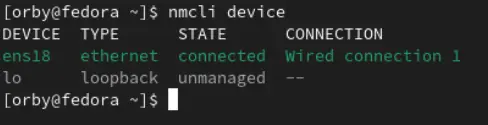
nmcli device
nmcli device
Ok, this is an eye opener. I’ll have to modify my command to (hopefully you don’t have to):
nmcli connection modify “Wired connection 1” ipv4.address 192.168.0.100/24
Same applies to gateway and DNS settings:

And to be certain that IP address is static, we type:
nmcli connection modify “Wired connection 1” ipv4.method manual

Next step is to restart the interface:
nmcli connection down “Wired connection 1”; nmcli connection up “Wired connection 1”

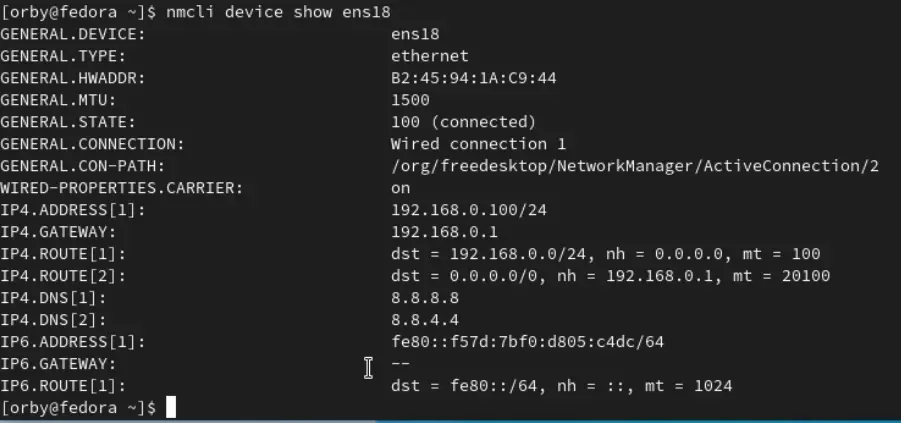
Now let’s see the results of our static IP address setting:
nmcli device show ens18

Or just to finish in same way as we started:
ip a
Summary
With that we came to an end of this article. We covered the steps how to set a static IP address in Linux and we explained the process for Ubuntu, Debian and Fedora. Share your thoughts in comment section, stay sharp and see you soon in another tutorial.